First off, I want to say hi to all my new blog friends! I have had lots and lots of emails in the last day with several questions and I thought I would stop in and answer them.
The Card Hanger Dies are up first. This is a die that cuts card stock with an A2 size opening, to add to the front of your gift bag. This lets the cards that we spend so much time on, act as the decoration for your gift bag. That, and it makes it so your card doesn't get lost down inside the bag....which happens often. :)

(Rectangle Die Shown above)
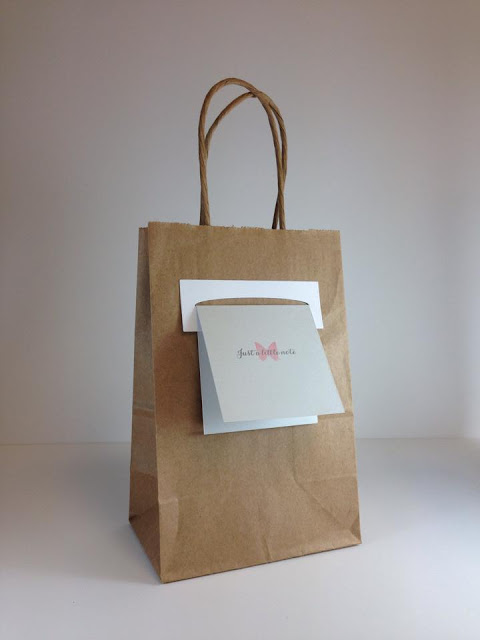
(Mini Stitched Die shown above. This is a 3x3 card in this photo.)
Right now I have a few Rectangle left and I just added the Mini Dies back to my little store....well, actually the Paypal button over there on the right sidebar! :) I have the Decorative and the Scalloped on order and hope to see them soon! Please email me if you have any questions!
(Rectangle Die Shown above)
(Mini Stitched Die shown above. This is a 3x3 card in this photo.)
Right now I have a few Rectangle left and I just added the Mini Dies back to my little store....well, actually the Paypal button over there on the right sidebar! :) I have the Decorative and the Scalloped on order and hope to see them soon! Please email me if you have any questions!
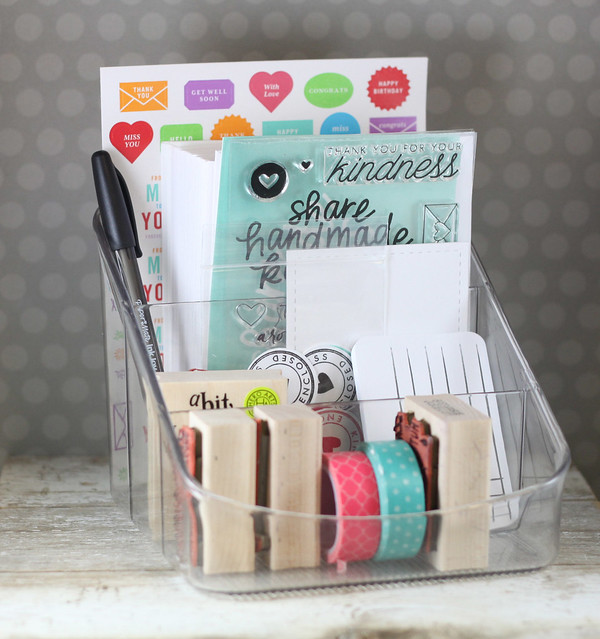
Next up, some of you have stopped in from Jennifer McGuire's blog! Jennifer has been so sweet to have me as a guest a couple of times and its always been so much fun! The first post was all about the little Mailing Station....You can see her post HERE.
And the latest post was a video I did on how to use Press n Seal to arrange flowers on your card. You can see Jennifer's post HERE.
Now this isn't my first video using Press n Seal. Over a year ago, I did a Make it Monday Video for Papertrey Ink showing you how to use Press n Seal with Cover Plates. I have another video on how to line up Alphabet dies and one Fast Forward video on adding a sentiment to a card. This is fabulous stuff in the kitchen and in the craft room! I use it for lots of things in my craft room, including wiping up glitter messes and even embossing powder. It all sticks and can go in the trash. I've had a couple people ask too, can it be reused? Yes! It stays sticky for quite awhile.
Here is a list of my previous videos....
MIM: Using Negatives from Cover Plates
Press n Seal with Die Cuts
Press n Seal for quick sentiments
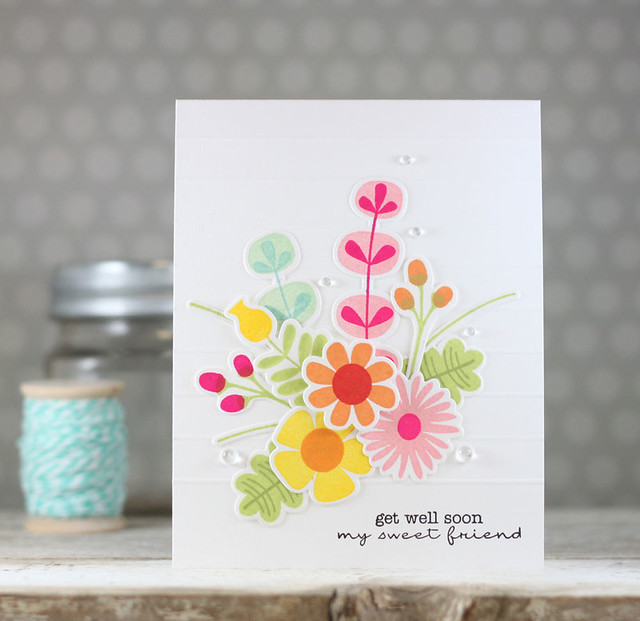
The most asked question is regarding the inks I used for the flowers in this card. Here is the list...
The leafs are stamped with Sour Apple and Gumdrop Green. The flowers are Banana Split, Orange Fizz, Cotton Candy, Razzle Berry, Wild Cherry, Coral Crush, Berrylicious and Lush Lagoon. Again, these are all My Favorite Things Premium Dye inks. Awesome colors, huh? :)
The stamp set is called Fall Florals and you can find the coordinating dies HERE. I have been asked a couple of times how I lined up the stamps and die cuts. These die cuts are actually very easy to line up with your stamp, so I just eyeballed it. There were a few in the trash that didn't turn out so perfect if you watch the video, I have tons of die cuts to work with.
I hope you find this info helpful and thank you for stopping in! :)
Press n Seal with Die Cuts
Press n Seal for quick sentiments
The most asked question is regarding the inks I used for the flowers in this card. Here is the list...
The leafs are stamped with Sour Apple and Gumdrop Green. The flowers are Banana Split, Orange Fizz, Cotton Candy, Razzle Berry, Wild Cherry, Coral Crush, Berrylicious and Lush Lagoon. Again, these are all My Favorite Things Premium Dye inks. Awesome colors, huh? :)
The stamp set is called Fall Florals and you can find the coordinating dies HERE. I have been asked a couple of times how I lined up the stamps and die cuts. These die cuts are actually very easy to line up with your stamp, so I just eyeballed it. There were a few in the trash that didn't turn out so perfect if you watch the video, I have tons of die cuts to work with.
I hope you find this info helpful and thank you for stopping in! :)


Such a gorgeous card!
ReplyDeleteThanks for touching base with us Laurie. I really appreciate that.
ReplyDeleteI saw your video on the mailing station at the time but for some reason it didn't occur to me to subscribe. So I am one of your newest subscribers! I am excited to see more of your work and look forward to catching up on your past videos.
Your card is really pretty! I have to admit I bought a box of Press'n Seal months ago when Jennifer first shared her husbands ingenious idea. This really is quite clever. TFS!
Pretty card. Love the colors.
ReplyDelete
ReplyDeleteI thoroughly enjoy all the videos I have seen and appreciate your gorgeous work and great ideas! I am so glad that I found you through Jennifer. Keep up the good work!
Thank you for your list of inks used! I love your card and the video was great!
ReplyDeleteGood job on the card, and I really love all the tips! Thanks...
ReplyDeleteGenius Laurie!
ReplyDeleteWell, aren't you the clever one! I love this trick! Thank you for taking the time to post and make a video of this clever trick, using Press n Seal.
ReplyDeleteI saw your Video on Jennifer's blog and thought is was so COOL! What a clever idea and your card was just darling. I will be definitely following you in the future to see what else you have up your sleeve (or in your kitchen)
ReplyDeleteI love the CAS card you made while describing the Press N Seal technique. Thank you!
ReplyDeleteFabulous and so very inspiring :)
ReplyDeleteThis is quite the thing to have in your bag of tricks. I really enjoy your CAS Cards that you create.
ReplyDeleteLove,Love,Love this idea! I use press and seal all the time in my kitchen so always have it on hand! So clever, thanks for sharin' whowouldofknown ;)
ReplyDelete