10/30/18

MFT Hits and Highlights...

It's time for another round of My Favorite Things, Hits and Highlights!  Here is the challenge for the MFT Design Team....

With the Christmas season approaching quickly, we’re bringing some merry and some bright to your computer today. We’ve challenged our designers to feature products that include “merry” in the name or to add some brightness to their projects with their favorite lights. You’ll surely be inspired to tackle your own holiday cards after checking out their creations!

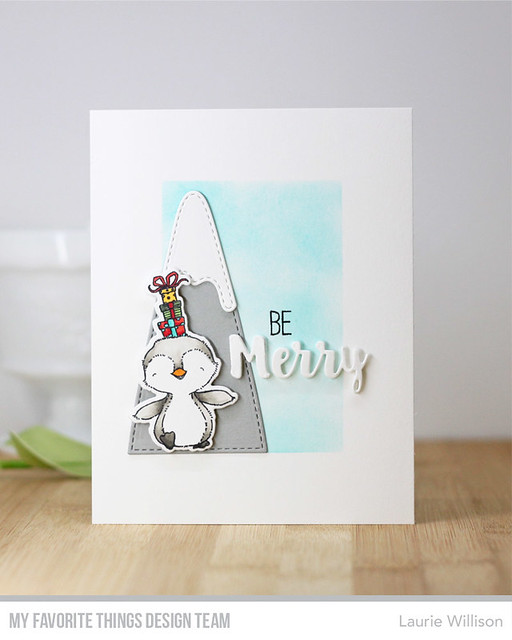
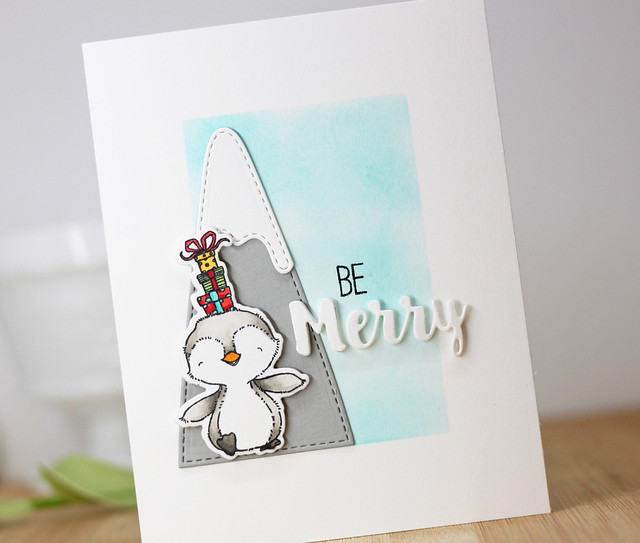
With that, I new exactly which die I wanted to use for this creation.  And exactly which stamp set.  The new penguins were calling my name along with the Merry Christmas die from MFT.  Here is today's creation....

MFT Hits and Highlights

To create this card, I masked off the background and did a little oxide ink blend with Peacock Feathers.  To that, I added one mountain from the Snow Capped Mountain Dies.  Next, I colored up one of those adorable Penguins from the new set Sweet Holiday Penguins.  I popped up the Merry on the card front and then added the "BE" from a masked off Best Wishes out of the Birdie Brown Greeting Galore set.  I love that I can occasionally find a little sentiment addition just by masking off another stamp.  And that is it!  Clean and simple!

MFT Hits and Highlights

Check out the rest of the Design Team's creations by heading over to the MFT Blog.  Thanks so much for stopping in today!


_____________________________________

FIND ME OVER ON:

Instagram: Laurie Willison (@laurie_willison)


Facebook: Soapbox Creations

All products in today's post are linked below and throughout the post.  These are my personal affiliate links which you can shop from at no cost to you!  :)  Thank you for supporting Soapbox Creations!  
10/25/18

Altenew Dynamic Die Cutting Blog Hop...

Hey there Altenew Friends!  I am so excited to be hopping along with a list of talented ladies.  Today we are here to showcase some of the amazing dies that Altenew has available.  Check out the details below but Altenew has a great sale on their dies today!

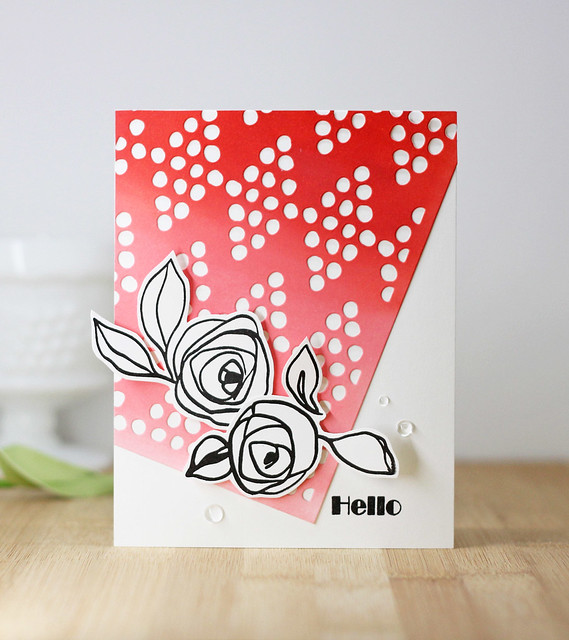
Today I am using Doodle Dots Cover Plate to create a fun and colorful background on this clean and simple card.....

Altenew Die Cutting Hop

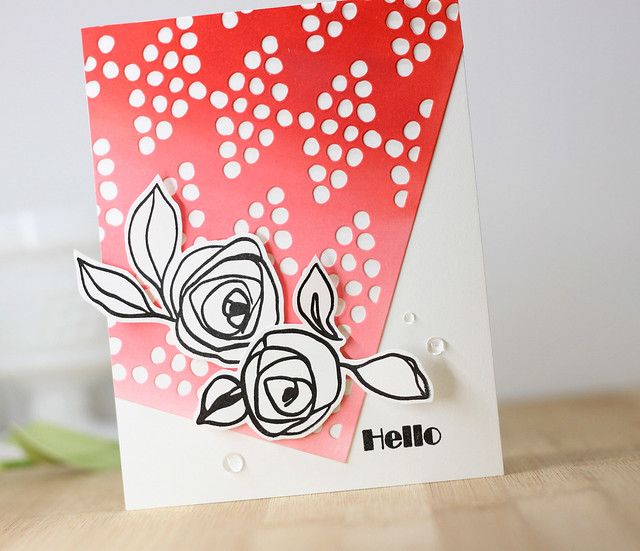
To create this card, I did some ink blending with Candied Apple and Worn Lipstick Oxide inks on 80 lb Neenah Solar White cardstock.  I die cut the cover plate out of the ink blended cardstock to get the perfect blend placement.  I decided to angle the cover plate instead of use it on the background.  I like the little bit of white showing on the card base.  (all supplies linked below)

Next, I stamped and die cut 2 of the roses in the Bamboo Rose set.  I just love these roses and how they look in black and white against the colorful background.  I added the Hello sentiment from Leaf Canopy and then finished off the card with some clear dew drops.  

Altenew Die Cutting Hop

That is it for me today.  Check out the details of the Giveaway, the sale info and the list of stops on the hop below. 

_____________________________________

GIVEAWAY

Altenew is giving away a $30 gift certificate to five lucky winners! Please leave a comment on the Altenew Card Blog by Wednesday, October 31st for a chance to win. Five winners will be announced on the Altenew Card Blog on 11/4/2018.

_____________________________________

SALE

Save 15% off on all dies including alphabet dies, cover dies, 3D dies, layered dies, and coordinating dies from 10/25/2018 until 10/27/2018 at 11:59 PM EDT or while supplies last. No code needed to enjoy this sale! Not valid on previous purchases.


_____________________________________

BLOG HOP

Laurie Willison (you are here!)
Laura Jane

Thank you so much for stopping in today!  I hope you enjoyed my Altenew creation for today.  Hope you have a great day!


_____________________________________

FIND ME OVER ON:

Instagram: Laurie Willison (@laurie_willison)


Facebook: Soapbox Creations

All products in today's post are linked below and throughout the post.  These are my personal affiliate links which you can shop from at no cost to you!  :)  Thank you for supporting Soapbox Creations!  
10/22/18

Hooray for a Pink Truck! {Spellbinders}...

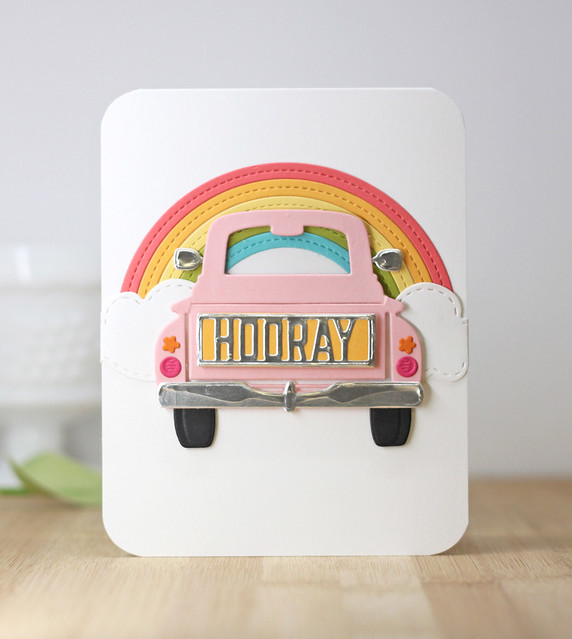
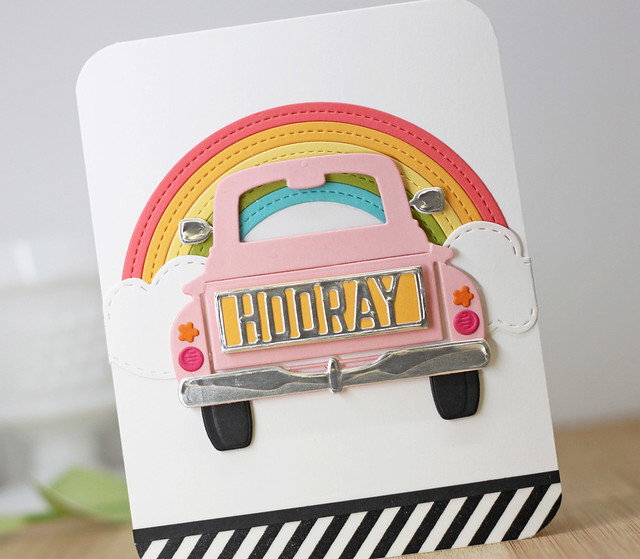
So I made another truck.  The Spellbinders Large die of the month is still available and still fabulous! You have until October 31st to subscribe and get one of these adorable trucks for yourself.  

_____________________________________


Do you know about the die of the month?  It is an awesome subscription that gives you a brand new set of dies in the mail every month.  Here are a few more details....


Each month Spellbinders offers several different subscription clubs....


_____________________________________

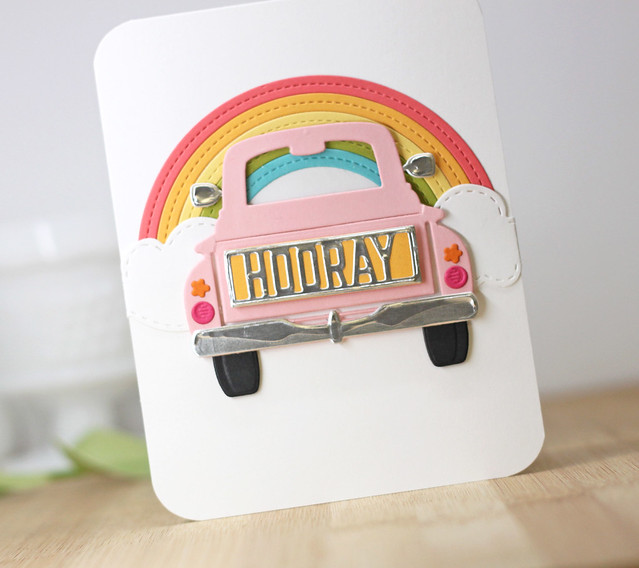
Check out this adorable die set and how the little truck looks in pink....

Spellbinders

To create this card, I took the MFT Stitched Rainbow and added the die cuts to the card base.  I used my most favorite stitched clouds ever, from Lil Inkers, and added those to the bottom of each bow.  Next, I built the cutest pink truck ever!  I gave it a chrome bumper and chrome mirrors.  I layered the chrome sentiment on to an orange tailgate.  I felt like hot pink tail lights were perfect and just to keep up the fun, I added some darker orange flower taillights.  

Spellbinders

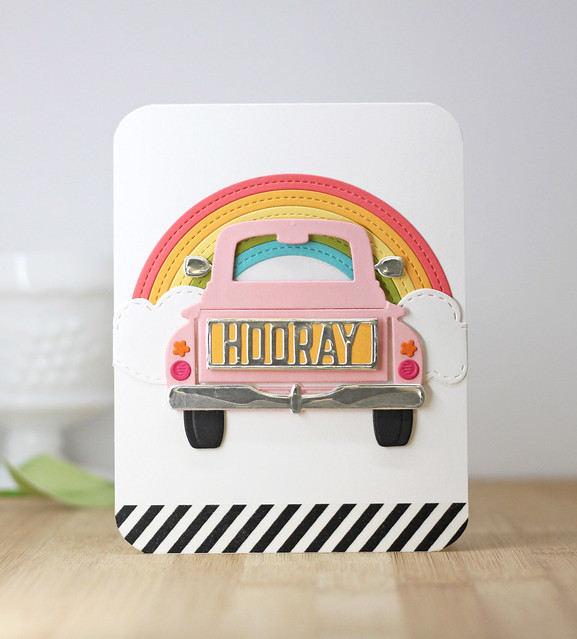
After staring at the card for awhile, I wondered if it needed something to ground the image, so I added some black striped washi....

Spellbinders

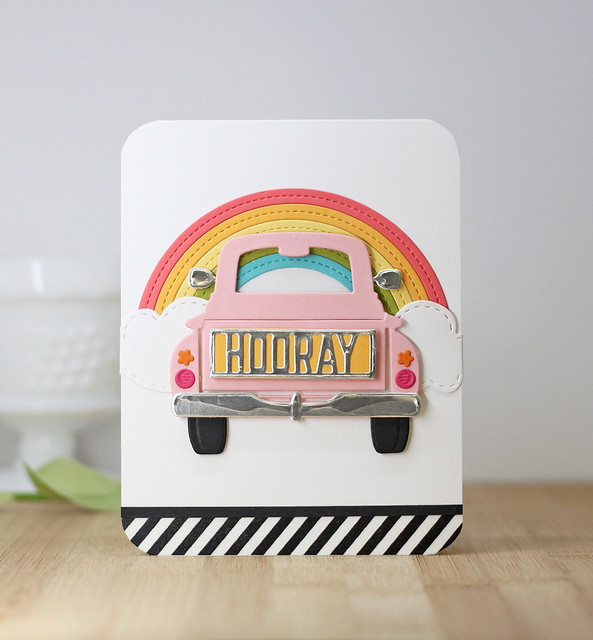
And then I wondered if that needed to be capped off with this black cardstock strip....

Spellbinders

So now you can see the process I went through to create this clean and simple card.  Which way do you like it?  All white?  Washi?  or Washi with the black strip of cardstock? 

Spellbinders

Now I am thinking about a red truck.....so that is where I am headed!  Head on over to Spellbinders and grab this adorable die set!  Thanks so much for coming by today!


_____________________________________

FIND ME OVER ON:

Instagram: Laurie Willison (@laurie_willison)


Facebook: Soapbox Creations

All products in today's post are linked below and throughout the post.  These are my personal affiliate links which you can shop from at no cost to you!  :)  Thank you for supporting Soapbox Creations!  

10/20/18

hello {Neat and Tangled}...

So in the crafty world, I love 3 things.  Well, I love a lot more than that....but the top 3...

1. White space...clean and simple cards.
2. Rainbow...becuase who doesn't!  Gods promise!!
3. Clouds.  White fluffy ones or in this case lets combine them....rainbow clouds!

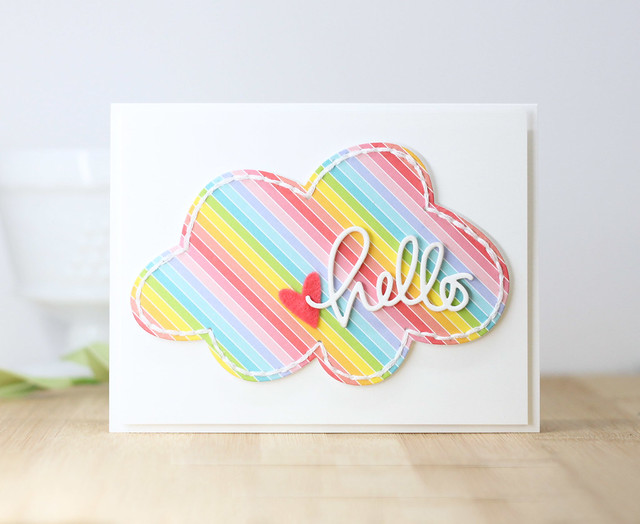
So when Neat and Tangled came out with these stitched clouds, I knew I had to have them!  I love stiching with felt.  These dies make it so easy and so much fun but I knew I had to do some stitching with paper.  (all my supplies are linked at the end of this post)

Neat and Tangled

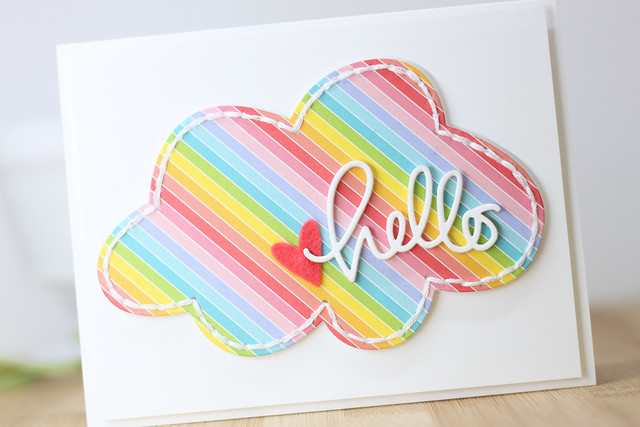
To create this card, I folded a white card base and then added a white panel to the front with fun foam.  Next, I die cut 2 clouds.  One in this gorgeous rainbow paper from Lawn Fawn and another in 110 lb white card stock.  I adhered them together with Tombow Mono Liquid Glue to give the stitching a nice sturdy base.  It was much easier to stick with the heavy backing.  I used white twine and stitched the cloud.  Next, I used some gorgeous Felt to cut out the little heart that comes with the cloud die.  I knew it needed some more white so I found this little hello from Simon Says and die cut it about 5 times.  I used my spray adhesive and stacked them up so they added a good bit of dimension from the cloud.  I went in and trimmed off the tale of the H so it would lay flat with the flat heart.  I just couldn't help it and I had to have some more dimension so I added the cloud to the card front with foam tape.  This card was just so fun to make and now it lives with a very sweet friend of mine!  :)

Neat and Tangled

Thats all for me today!  I hope you have enjoyed my cloud card.  Thanks so much for stopping in!


_____________________________________

FIND ME OVER ON:

Instagram: Laurie Willison (@laurie_willison)


Facebook: Soapbox Creations

All products in today's post are linked below and throughout the post.  These are my personal affiliate links which you can shop from at no cost to you!  :)  Thank you for supporting Soapbox Creations!  
10/19/18

CAS Holiday Tags {Spellbinders}...


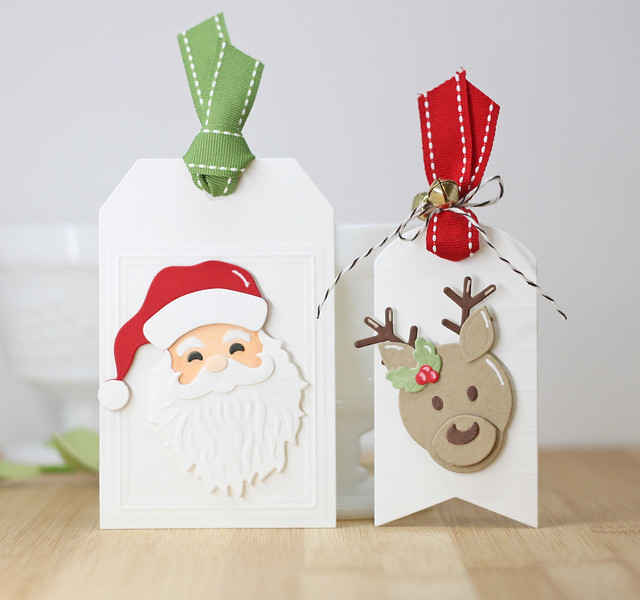
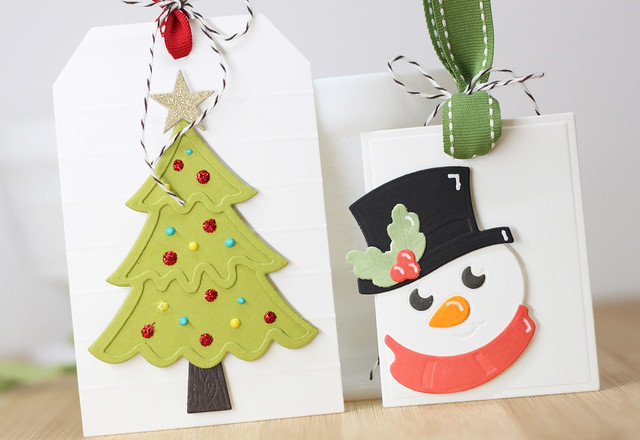
Hello Crafty Friends! Today I wanted to share a variety of tags using the  Holiday D-lites Dies. They are the most adorable dies that create amazing dimension when embossed. Today I am using the ReindeerSantaSnowman and Christmas Tree D-lite dies.  I tend to make lots of tags for gifts at Christmas time and the simpler the better when it comes to mass production.
Spellbinders D-lites
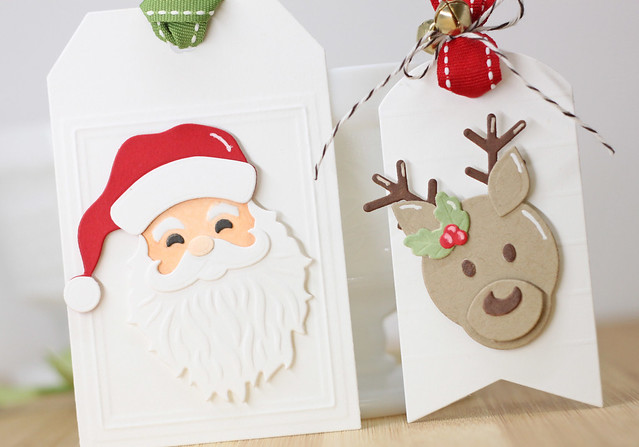
To create these tags, I used the D-lites Santa and Reindeeer dies. The Santa tag was created using a basic tag die along with a Rectangle die to create an embossed rectangle on the tag.  I love how a simple embossed line can create so much detail on an otherwise plain tag. I die cut and built the adorable little Santa Face and added him to the tag with foam tape. To change it up a little, I grabbed another white tag in a different shape and added the Reindeer die cut.  One tip to make the die cutting go faster in assembly line fashion – add all the piece to one piece of white cardstock and cut them all out at once. Repeat this until you have several die cuts ready to go. By using a Copic marker to color the pieces, you can build the die cuts so much faster and even add interest with shading if you’d like.

IMG_7329Spellbinders D-lites
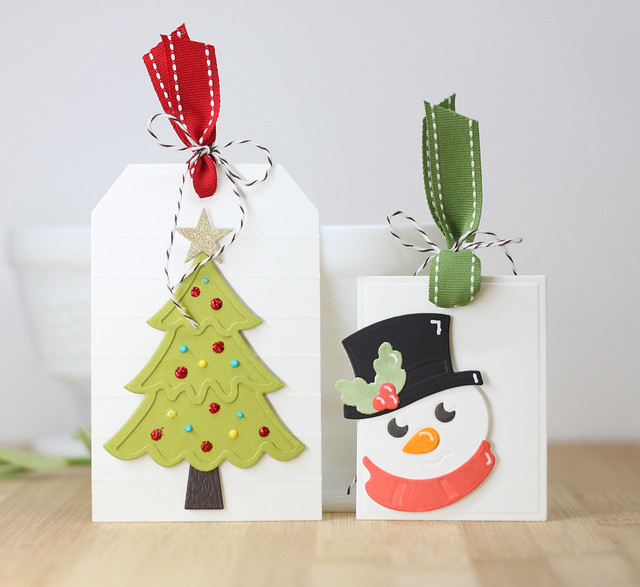
Here are 2 more tags using the Christmas Tree and Snowman D-lites.

Spellbinders D-lites
Another fun way to create a tag in a hurry is just to use a basic shape and then use a hole punch to turn it into a tag.  The snowman tag was created by using a Rectangle die. A great way to get that finished embossed look!
I added the Tree to a white tag after adding score lines.  Another way to add quick detail to a basic tag!
Spellbinders D-lites

I hope you have enjoyed my projects today.  Creating tags is so much fun and so easy to decorate those gifts at Christmas! Thank you so much for stopping in.  Have a great day!


_____________________________________

FIND ME OVER ON:

Instagram: Laurie Willison (@laurie_willison)


Facebook: Soapbox Creations

All products in today's post are linked below and throughout the post.  These are my personal affiliate links which you can shop from at no cost to you!  :)  Thank you for supporting Soapbox Creations!  


10/18/18

MFT Birthday Project...

For this weeks birthday project over at MFT Challenge Blog, I had 3 things in mind.  

1. Keep it CAS (clean and simple), as usual.
2. Use Tag Builder 5....because its my favorite.
3. Use those adorable Birthday Chicks.

So with that, here is what I came up with....

MFT Birthday Project

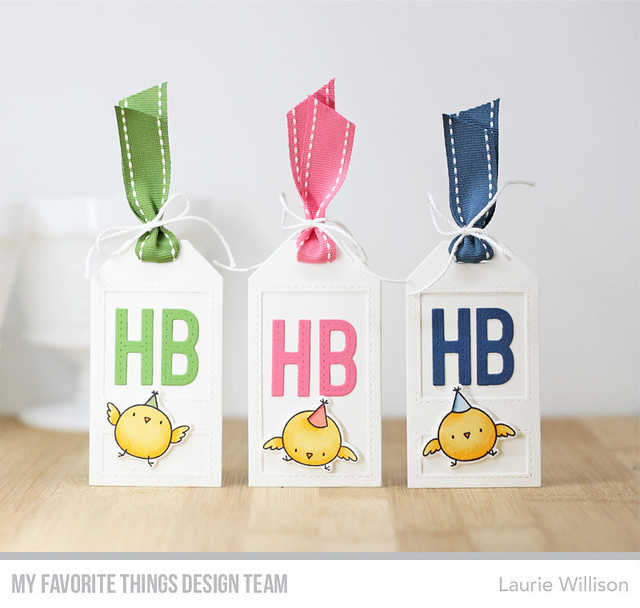
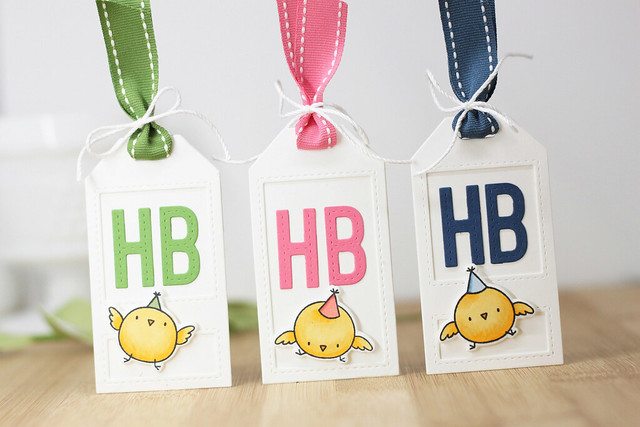
I die cut 3 solid tags and then 3 of the framed tags from the Tag Builder 5 set.  I attached them back to back so the front and the back side look nice and clean.  I used the Stitched Alphabet from MFT to add in the HB in coordinating colors to the ribbon.  I tied the ribbon on with a white twine bow.  Last, I colored up a different chick for each tag and added it to the front with a piece of foam tape.  

These tags would be a great pop of color to a gift or a gift bag.  I love that we can create these things in advance and have a little stash to add to gifts when we need it.

MFT Birthday Project

So that is it for me today.  Check out the MFT Blog for more info on today's Birthday Project.  The rest of the team will have lots more to see too! 

Hope you have a great day!


10/17/18

Thanks {Spellbinders}...

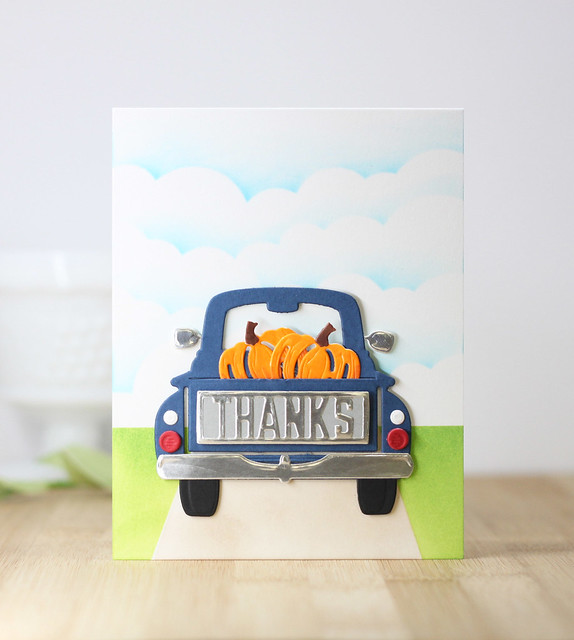
OK I am smitten.  The Spellbinders October Large Die of the Month is fantastic.  FANTASTIC!!

Check it out...

Spellbinders October Die of the Month

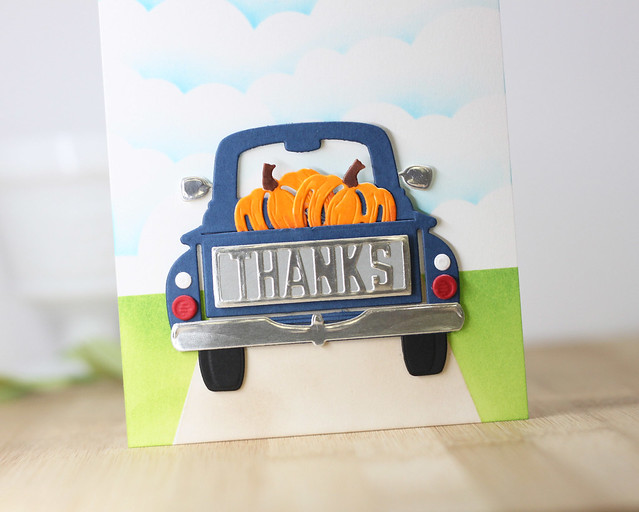
This set of dies is so much fun!  There is a truck base, a bumper, tires, side mirrors and then lots of details to add in to make some super fun cars!
To create this card, I created a white card based with masked off areas of grass, clouds and a dirt road.  Next, I took the truck and all its little (and oh so fun) dies to create this adorable truck!!

Spellbinders October Die of the Month

I am so in love.  This set is so versatile because it comes with all different kinds of dies to create different occasioned trucks. Is occasioned a word?  :)  I have so many ideas for so many trucks, that I am heading right now to go get busy with a few more!  

_____________________________________


Do you know about the die of the month?  It is an awesome subscription that gives you a brand new set of dies in the mail every month.  Here are a few more details....


Each month Spellbinders offers several different subscription clubs....


Thanks so much for stopping in today.  You know I will be back with more trucks soon!  :)


_____________________________________

FIND ME OVER ON:

Instagram: Laurie Willison (@laurie_willison)


Facebook: Soapbox Creations

All products in today's post are linked below and throughout the post.  These are my personal affiliate links which you can shop from at no cost to you!  :)  Thank you for supporting Soapbox Creations!  
10/16/18

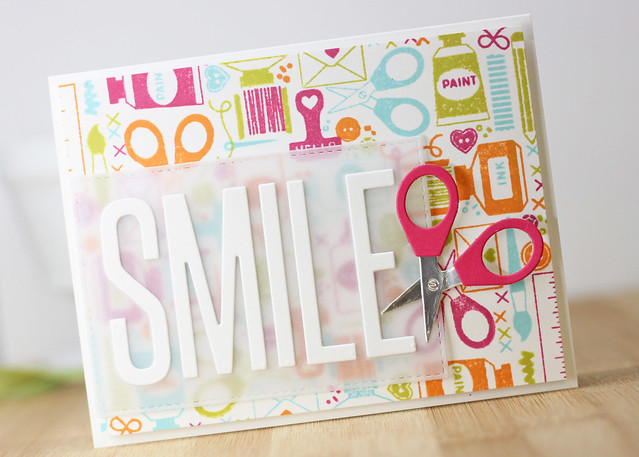
Smile {Concord and 9th}...

Oh my word.  This new set from Concord and 9th?  Its a craft must have!  Check out this amazing new Crafty Turnabout stamp set and the Crafty Dies...

Concord and 9th

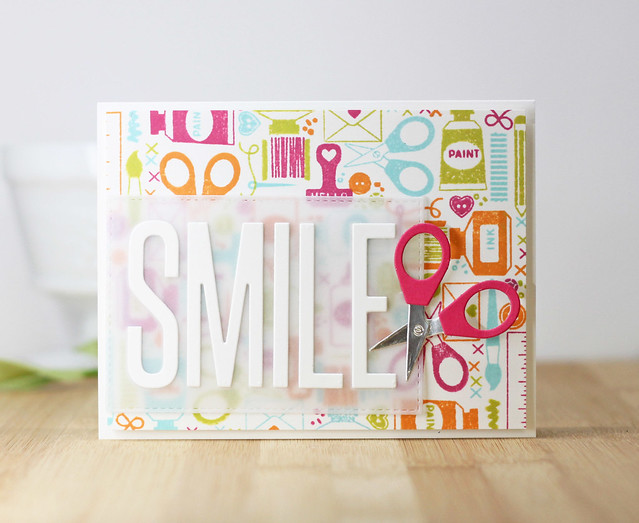
To create this card, I used MFT inks Razzleberry, Summer Splash, Sour Apple and Orange Fizz.  I put the turnabout stamp on my misti and used a cool template my friend Cheryl gave me.  It made stamping this turnabout a breeze.


I create date background panel and then added it to a white card base with fun foam.  Next, I die cut the Smile sentiment in white card stock and added it to vellum.  I popped that up on the card base with more fun foam for some added dimension.  Next, I die cut those scissors with silver card stock and then the handles with pink card stock and added them to the front of the card.  LOVE!  Those scissors are so much fun!!

Concord and 9th

You can buy the stamps and dies separate or you can buy them in a bundle.  Click HERE to check it out.

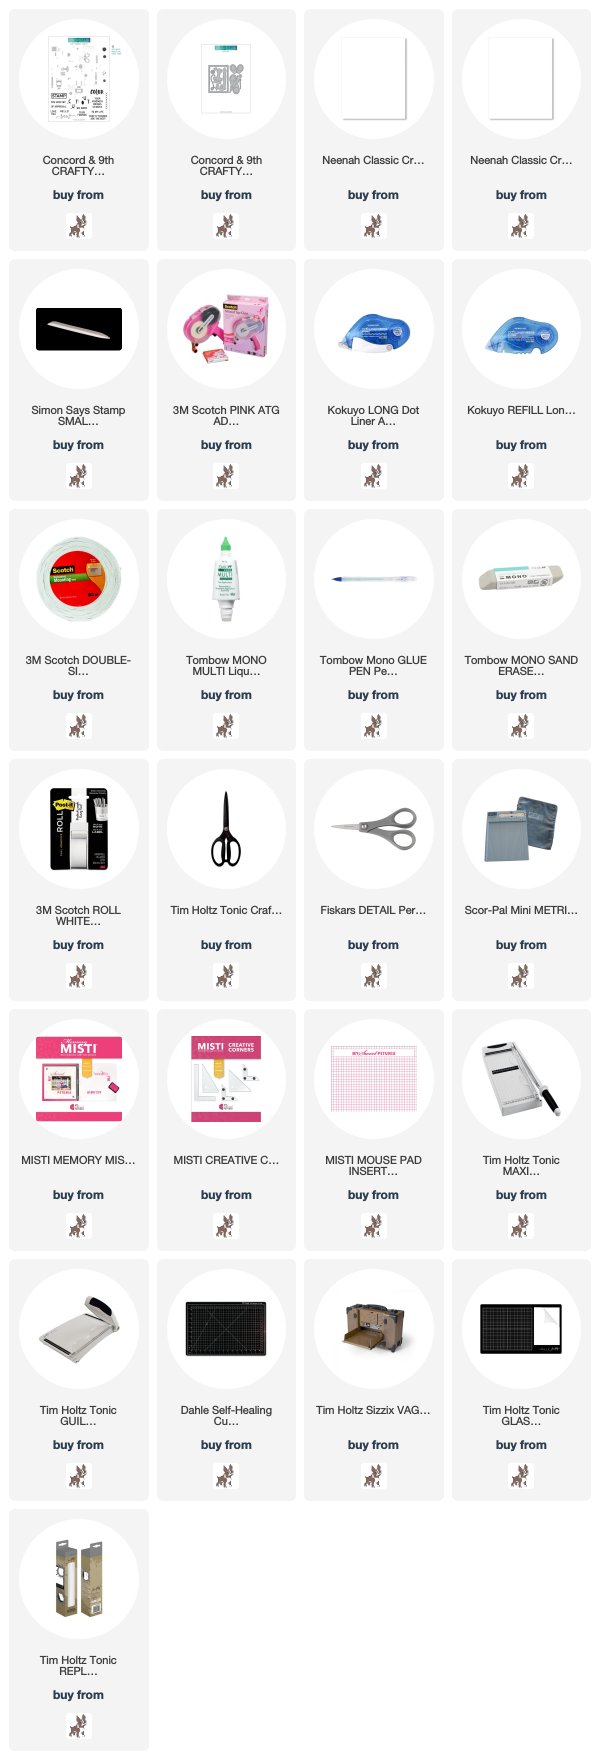
I hope you have enjoyed my card today.  Check out all the supplies I used below!  Hope you have a great day!

_____________________________________

FIND ME OVER ON:

Instagram: Laurie Willison (@laurie_willison)


Facebook: Soapbox Creations

All products in today's post are linked below and throughout the post.  These are my personal affiliate links which you can shop from at no cost to you!  :)  Thank you for supporting Soapbox Creations!  
MFT and Friends...

Hello there!  I am here today with a new card for this months MFT and Friends.  This latest release was all about Christmas with some fun new stamps, dies and the perfect snow stencil.  I did a little die cutting and a little stencil and pasting and this is what I came up with...

MFT and Friends

To create this card, I used the new stencil called Snow Flurry.  I used a little embossing paste to create a fun background on a piece of kraft card stock.  I die cut the ho ho ho in white cardstock and added it to the embossed background.  Next, I grabbed a piece of that red and white striped paper from the new Candy Land Paper Pack and lined a card base.  I added the kraft panel to the front of the card with fun foam for some dimension.  Last, I die cut the star center of the ho ho ho die in silver sparkle card stock and added that in for a little shine.

MFT and Friends

There will be lots more to see over on the MFT Blog.  Check it out!  So glad you stopped in today.  Have a great day!

_____________________________________

FIND ME OVER ON:

Instagram: Laurie Willison (@laurie_willison)


Facebook: Soapbox Creations

All products in today's post are linked below and throughout the post.  These are my personal affiliate links which you can shop from at no cost to you!  :)  Thank you for supporting Soapbox Creations!  

 
BLOG TEMPLATE BY DESIGNER BLOGS