11/28/19

Thank you {Picket Fences}...

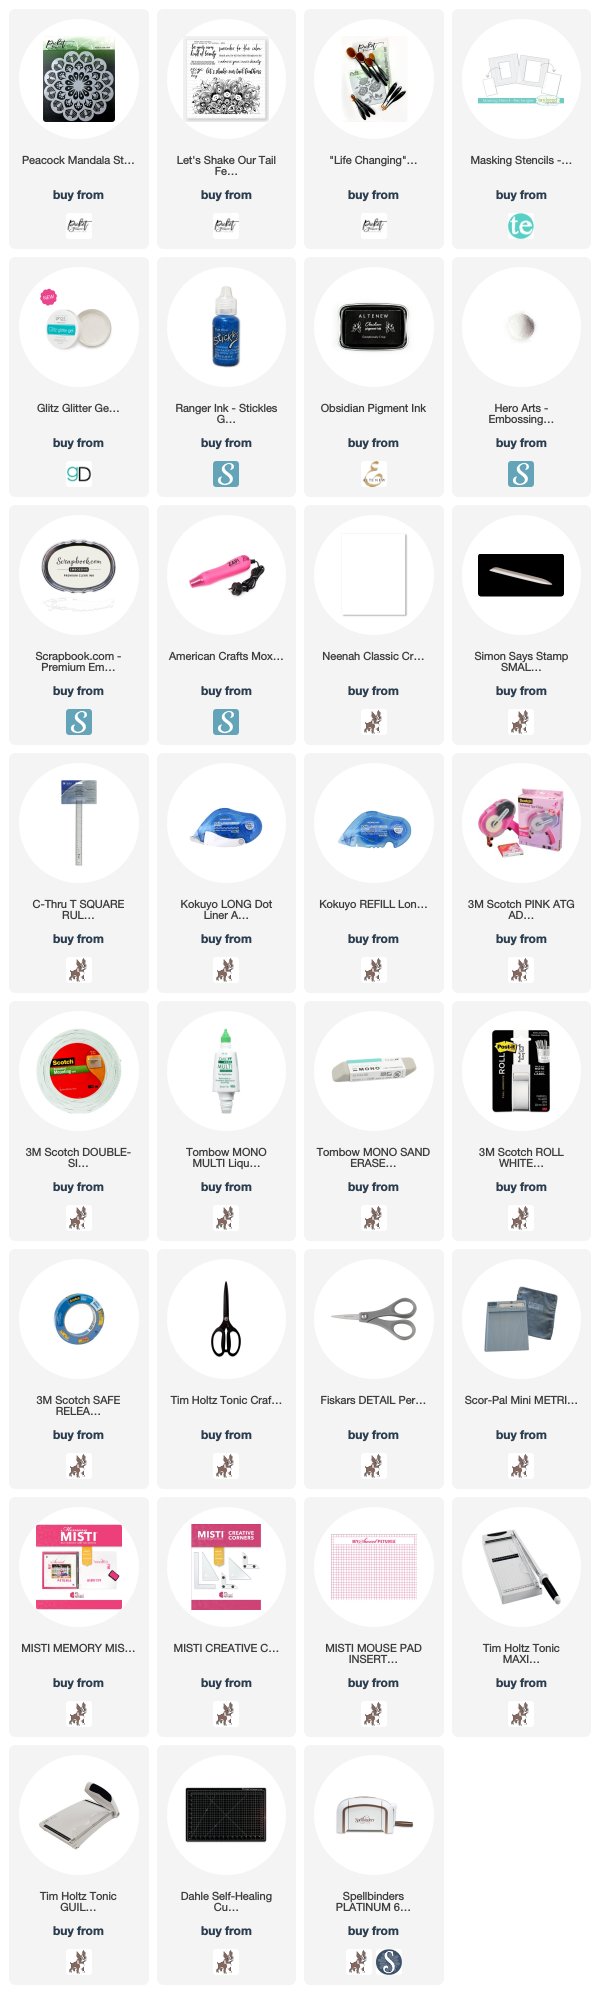
Picket Fences has a great Black Friday Sale! 20% off there store with promo code BLACK19.  Shop now by clicking HERE.  

Have you seen THIS Picket Fences Stencil?  When I saw it I was like....yep I need that!  check out this amazing detail....

Picket Fences

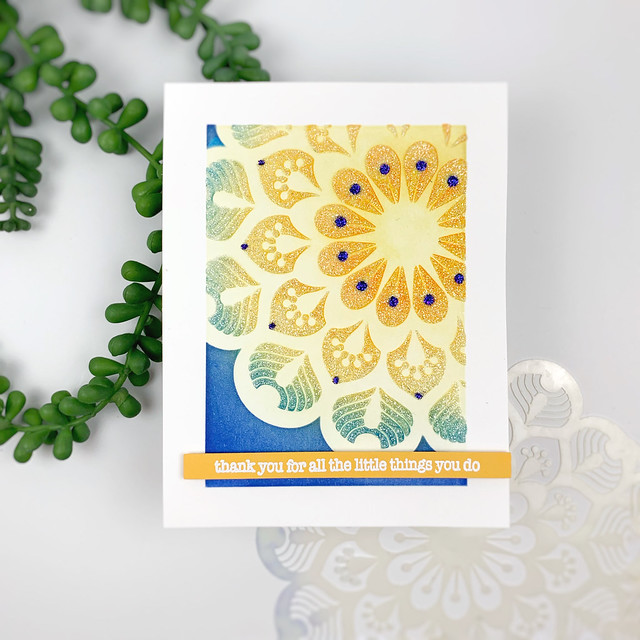
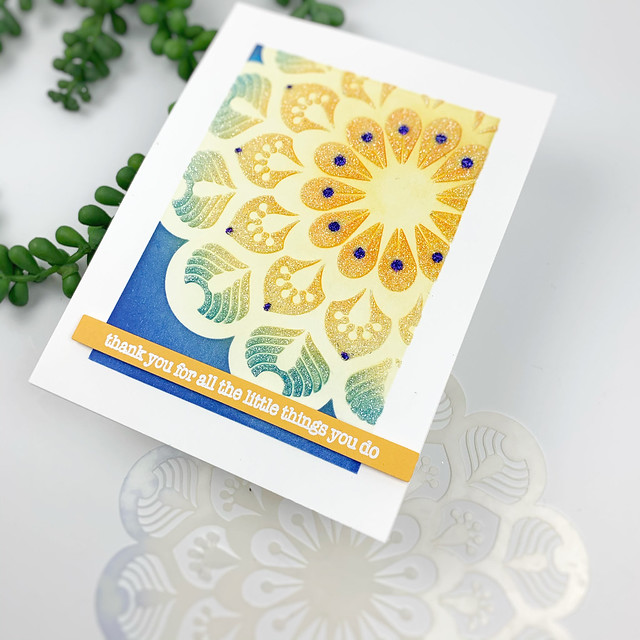
To create this card, I first grabbed a Taylored Expression Rectangle Masking Stencil to create the framed look.  Then I layered the mask with this gorgeous stencil from Picket Fences called Peacock Mandela  on top to blend in the ink.  I blended in yellows, oranges and blues all from Altenew.  

Picket Fences

Next, I went in with Gina K's Glitz Glitter Gel and added a layer of sparkle.  I used True Blue Stickles in a few areas to add in some blue sparkle.  Last, I heat embossed the sentiment from Picket Fences set Let's Shake our Tail Feathers, on some orange cardstock and added that to the card front with foam tape.

Picket Fences

Even though this card looks detailed, it was super simple.  Hope you enjoyed today's card!

Thanks for coming by today.  Hope you have a great day!


_____________________________________


FIND ME OVER ON:

Instagram: Laurie Willison (@laurie_willison)


Facebook: Soapbox Creations

All products in today's post are linked below and throughout the post.  These are my personal affiliate links which you can shop from at no cost to you!  :)  Thank you for supporting Soapbox Creations!  


11/26/19

MFT Hits and Highlights...


Welcome to MFT's Hits and Highlights.  Today's challenge is all about color.  Check it out....

Christmas is really a full season for many of us, not a single day, so if you’re still thinking of whipping up some holiday cards, we’ve got you covered. Hits & Highlights this month is all about bringing the feel of winter to your holiday with a cool palette featuring blues, pinks, and purples — bring a little shiver of delight with wintry colors evocative of falling snow and twinkling lights.

I decided to go with a blended background and a pop of sparkle.....

MFT

First, I heat embossed Serene Snowflakes onto some white cardstock.  Then I went in and blended in the pink, purple and blue.  I cut the card front down to 5 1/4" x 4" and added that to a white card base with fun foam.  

MFT

To add some more detail, I did a little white paint splatter on the card front before adding the sentiment.  Last, I die cut he Merry and Bright Die-namics from some silver glitter paper and then again out of fun foam.  I stacked those up and added them to the card from a dimensional sentiment.  

MFT

The rest of the MFT Design Team will have more challenge inspiration to see over on the MFT Blog. Head over there to check it out!

Thanks so much for coming by today!  Have a great day!


_____________________________________


FIND ME OVER ON:

Instagram: Laurie Willison (@laurie_willison)


Facebook: Soapbox Creations

All products in today's post are linked below and throughout the post.  These are my personal affiliate links which you can shop from at no cost to you!  :)  Thank you for supporting Soapbox Creations!  

11/21/19

Taylored Expressions Masking Stencils...they are back!!

The Masking Stencils from Taylored Expressions  ARE BACK IN STOCK today!!  Click HERE To grab your own before they are gone again.

Here is the back story of the stencils and a little more information about them.  Check out my IG today as Taylor and I did a quick IG Live.  

Go to @laurie_willison and check out my stories.  


_____________________________________

MASKING STENCILS

One of my favorite techniques is masking around the front of a card and adding in ink blending.  The problem with masking is that sometimes the masking tape decides to hold on to your card stock and rip your creation.  That has happened to me several times.  I knew there had to be something easier so this masking stencil idea just came to me!  I drew it out with a Sharpie and called my friend Jill Hawkins and asked her what she thought.  She told me she needed it yesterday! :)  So I assumed I was on to something.

Next, I called my friend Heather Nichols and she drew it up for me exactly like I pictured.  And then I called Taylor and the masking stencils were born!

Talk about an exciting day when they came in the mail.  I wanted to mask every card I made at that point.  They worked beautifully.  Here is the first blending project I did with the large rectangle masking stencil layered with Taylored Expression's Mosaic Leaves Stencil....


Here are the 4 sets of Masking Stencils that we have created.  There are 4 shapes, 2 of each which are all pictures below.  The stencils are $14 for the set of 2 and $48 for the full set.

The Masking Stencils will have lots of uses for mixing techniques but here are a few benefits....


1. No more masking with washi tape hoping your lines are straight and your paper doesn’t rip when you remove it. Simply use Pixie Spray or purple tape to adhere the stencil to the back of your cardstock panel - no more ripping!

2. There are two lines etched into each stencil for perfect alignment of an A2 card base or the layer just inside an A2 size (4” x 5.25”). Takes the guesswork out of centering the mask!

3. The stencil mask also includes the solid shape that falls out from the middle allowing you to reverse mask or apply two tones of ink to the project. 


Masking Stencils - Circle


Click HERE to check out how to purchase all 4 Masking Stencil sets in ONE BUNDLE.  


_____________________________________

LIMITED TIME PROMOTION


For a limited time, if you purchase the Bundle of all 4 shapes, you get a free 1/2" Purple Masking Tape.....


Hope you enjoy!  :)


The Greetery Winter Sketches and Pine Bough....


Welcome back to Day 2 of the Full Reveal for The Greetery.  Today we have several more amazing things to share.  

The new set called Winter Sketches is absolutely beautiful.  It is a multi-step stamp to create a gorgeous branch.  You can add color to the branch with the little buds.  The stamp set comes with a coordinating die to create the perfect die cut for your card front.

The Greetery

I used the Nordic Frames to die cut the card front panel.  I added a little blue ink blending to the center and then attached the branch, backed with a die cut of fun foam to the front.  Last, I stamped the sentiment from the Tree Trimmings set in red ink. 

The Greetery

This next card was so fun to make.  I used Botanical Cuts Pine Bough Dies to create this focal point....

The Greetery

I grabbed a red card base for this card and then die cut the branch and the pine cones.  For the branch I used Kraft card stock and then added in some dark brown comic shading.  I used green card stock for the pine needles but added in darker green comic in the centers.  last, I built those 2 adorable pine ones.  They have several layers but they are so easy to make!  I tied a couple tags on the branch with some twine and the splattered the whole thing with some white paint.  I added the branch to the card base with foam tape to finish it off. 

The Greetery

These girls have lots more to see!  Stop by their blogs and leave them some love!  Remember Products will be available in The Greetery shop on Friday, November 22 at 10am EST.


So glad you stopped in today.  I can't wait to hear what you think about this latest Greetery Release. Have a great day!


_____________________________________


FIND ME OVER ON:

Instagram: Laurie Willison (@laurie_willison)


Facebook: Soapbox Creations

All products in today's post are linked below and throughout the post.  These are my personal affiliate links which you can shop from at no cost to you!  :)  Thank you for supporting Soapbox Creations!  

11/20/19

MFT Vault Day 2....


Welcome to Day 2 of the latest Vault Release at MFT.  Today I am sharing the set called You Have My Heart...

MFT Vault

First, I did a little stenciling with some light gray ink.  I heat embossed a sentiment from the set and popped it up on the Stitched Fishtail banner.  I colored up that adorable little pup and popped it up on foam dots.  So quick and easy!

MFT Vault

The rest of the design team will have lots more to see.  Stop by the MFT Blog to see a list of stops to make today!

Hope you have a great day!


_____________________________________


FIND ME OVER ON:

Instagram: Laurie Willison (@laurie_willison)


Facebook: Soapbox Creations

All products in today's post are linked below and throughout the post.  These are my personal affiliate links which you can shop from at no cost to you!  :)  Thank you for supporting Soapbox Creations!  

The Greetery Full Reveal Day 1.....


I am so excited to share the November Release over at the Greetery.  We have 2 days of reveals for all the new stamps and dies.  These new products are amazing and perfect just in time for Christmas. 

First up, the Speed Tagging Prints Paper pack.  This gorgeous pack of paper works perfectly with the Speed Tagging Die....

The Greetery

I kept these so super simple, just so you can see how easy they are.  Line up the die to the paper, run them through your die cut machine and boom! Done!  I added sentiment from Speed Tagging Christmas Sentiment Stamp Set.  I added a fun chunky twine to each tag to finish them off.  These will be so cute paired with a Kraft or red wrapping paper.  I love how easy they are so you can mass produce them for Christmas.  

The Greetery

This next set is called Pine Blossoms Stamp set.  It is gorgeous multi step stamp that creates a beautiful Christmas bouquet.....

The Greetery


I lined up the stamp along the bottom of the white card front and stamped each step.  Next, I scored a 1/2" line around the sides and top of the cardstock. 


The Greetery

Last, I found a simple sentiment from Sentiment Suite: Christmas Stamp Set and added it to the card with black ink.  I love the clean lines that these stamps create for simple cards. 

The Greetery

Here are the stops to make today so you can see all the new products.  I know these girls are going to have some amazing projects to see!


Head on over to the Greetery Blog to learn all about this months release.  Thanks for coming by today.  Stop back tomorrow to see more!  :)

11/19/19

MFT Vault Day 1....

Over at MFT, the vault is opening!  They are bringing back some past favorites that will be available again in the MFT Shop.  Today, I have one little cutie to share from a stamp set called Cheers!

MFT Vault

To create this card, I used one of the Card Sized Confetti Stencils in the background and just tapped in some Silver Delicate Ink.  I die cut and popped up the Cheers sentiment in silver glitter cardstock.

MFT Vault

Last, I colored up this adorable image and popped her up on fun foam for a little more dimension. 

MFT Vault

Check out the rest of the latest stamp sets from the Vault.  Head on over to the MFT Blog to check it out!

Hope you have a great day!


_____________________________________


FIND ME OVER ON:

Instagram: Laurie Willison (@laurie_willison)


Facebook: Soapbox Creations

All products in today's post are linked below and throughout the post.  These are my personal affiliate links which you can shop from at no cost to you!  :)  Thank you for supporting Soapbox Creations!  

11/18/19

25 Days of Christmas Tags {Concord and 9th}...


Hello friends!  I am so happy to be joining my sweet friend Tracey today on her 25 Day of Christmas Tags.  Check out all the details for this amazing event by clicking HERE.  You can play along and you'll have a chance to win prizes!  


 Today I have a Concord and 9th Tag using one of my favorite sets, O Christmas Tree!  


25 Days of Christmas Tags

To create this tag, I used the We Are Memory Keepers Tag Board.  Lets just take a second to talk about this AWESOME tool!  This board works to cut any size tag.  I LOVE this tool.  I have been making all the tags lately.  It works so quickly to mass produce!  

So I cut a white tag and a red tag.  For the red tag, I stenciled in the Classy Stripes Stencil from Alenew.  I blended in Scrapbook.com's Embossing Ink to give it a fun watermarked look.  I heat embossed the large sentiment from O Christmas Tree in gold embossing powder.  I stamped the trees in black along the bottom of the white tag.

Using green ribbon and twine, I tied the 2 tags together to finish it up!


25 Days of Christmas Tags


Here are all the amazing sponsors for the 25 days of Christmas Tags.....


Head on over to Tracey's blog to learn more!

Thanks so much for coming by today!


_____________________________________


FIND ME OVER ON:

Instagram: Laurie Willison (@laurie_willison)


Facebook: Soapbox Creations

All products in today's post are linked below and throughout the post.  These are my personal affiliate links which you can shop from at no cost to you!  :)  Thank you for supporting Soapbox Creations!  

 
BLOG TEMPLATE BY DESIGNER BLOGS