5/29/15

Hello Friend...

Hi friends!  Long time no see.  Things have been crazy here with the end of school and now the first week of summer.  I haven't had much crafty time and am missing my crafty friends and my craft room too!  I do know that it is a disaster down there though.  It's bad.  lol!  I hope to have some time in July to sit down and get it all organized and do some purging.

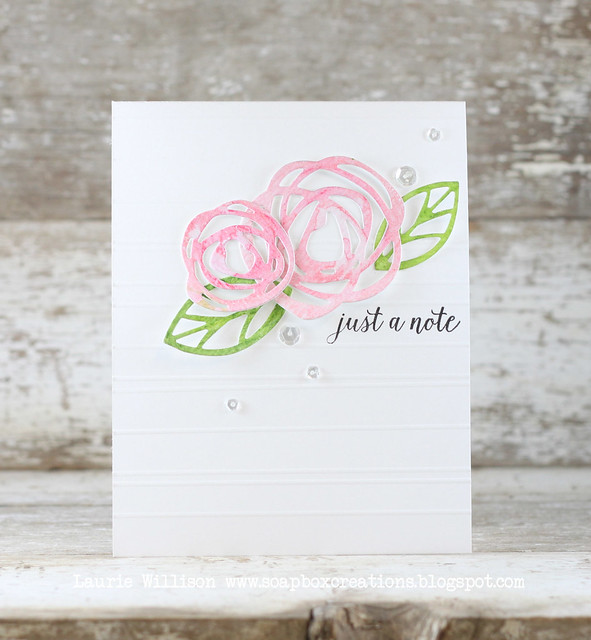
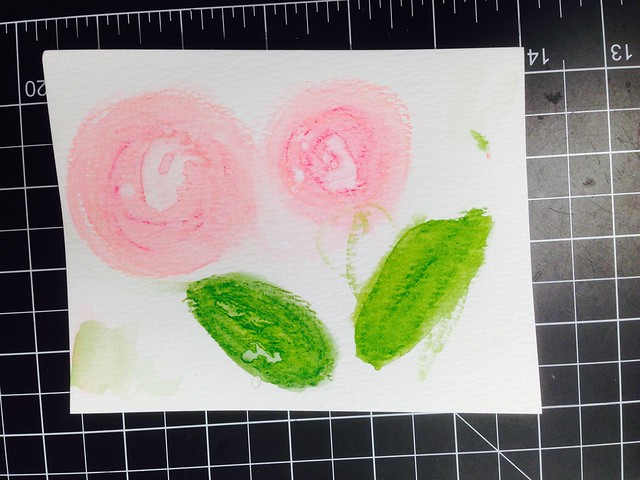
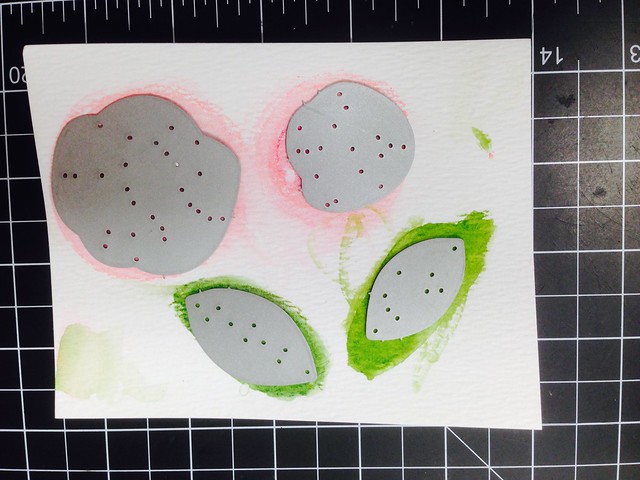
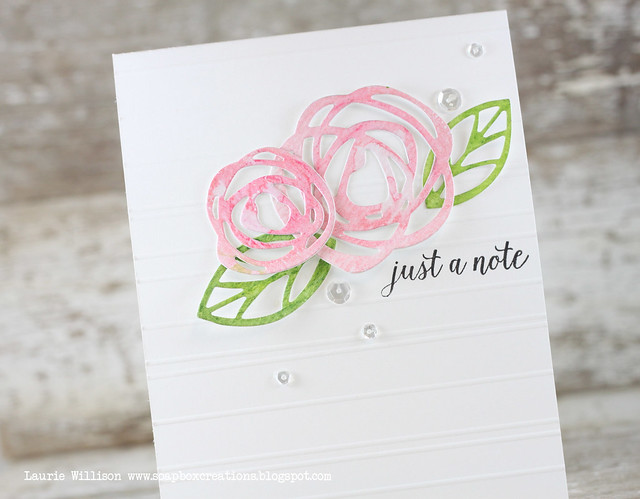
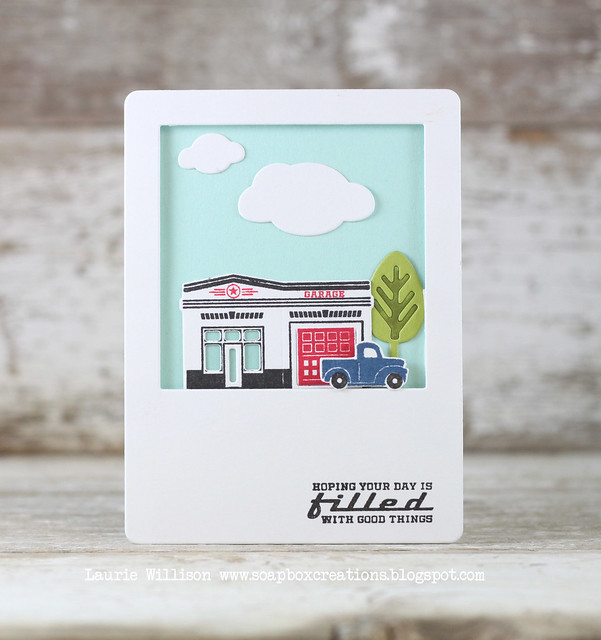
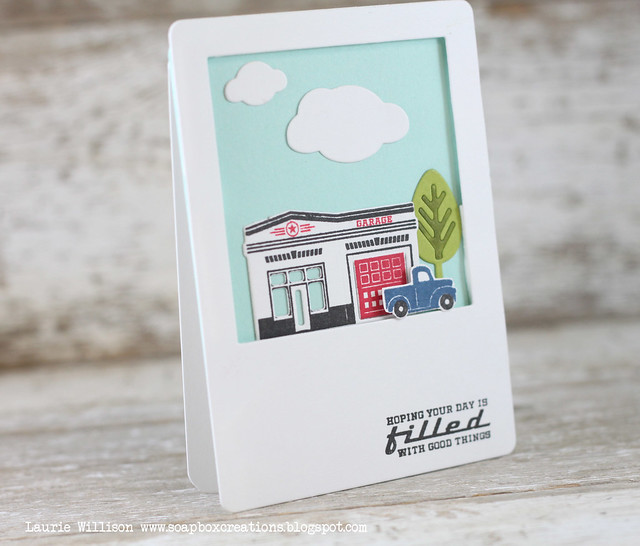
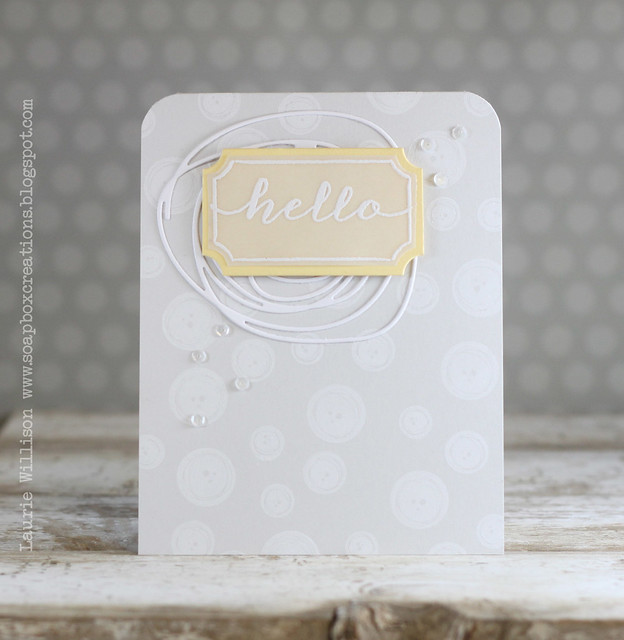
OK so I needed a quick card for a friend, so I pulled out the my Favorite Things Build-able Blooms stamps and dies to make a fun little scene...

May 2015 MFT

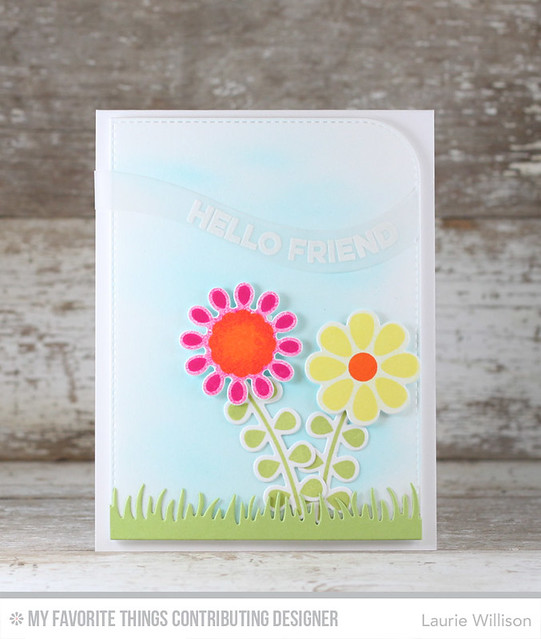
I used Blueprints 22 for the back panel with a little Copic Airbrush detail for the blue sky.  I added in the Fresh Cut Grass die before adhering down the blooms.  I used Wavy Greetings on a little wavy piece of vellum I cut with the Ride the Wave dies.
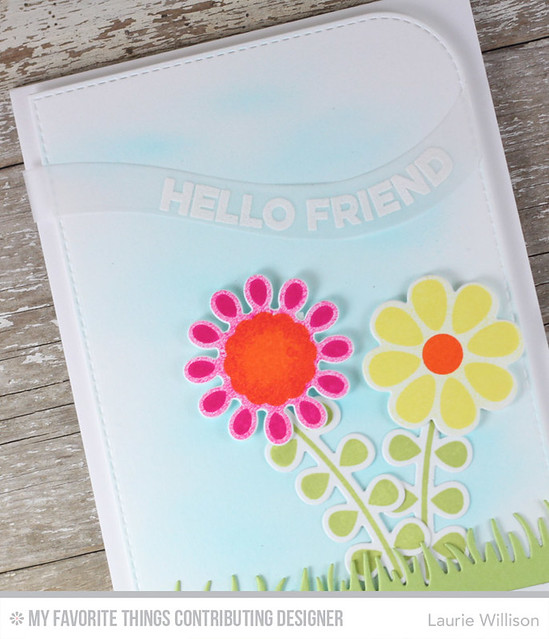
May 2015 MFT

So that is it for today!  It's going to be a tad quiet for awhile.  The month of June is pretty much going to be a blur.  Lots of fun to be had here so I am hoping it doesn't go by too fast.  Thanks so much for stopping in today!  Hope you have a great day!


5/25/15

We Flamingo!!

Good morning!  I have a quick and simple card using mostly dies from My Favorite Things.

MFTMay2015

First off, these flamingos are SO cute!  And super easy to put together.  I actually cut all the pieces out in white and then colored each piece with a Copic.  Easy peasy!  I cut the hills out of the Cross Stitch Oval Stax dies.  One die made both hills.  Next, I cut one of the flower dies from Buildable Blooms, to made a few flat bottom clouds.  Last, I stamped the sentiment on the bottom of the hill in black ink.  

MFTMay2015

Do you have any fun plans for today?  We have friends coming over and then just getting ready for the week.  We are officially on Summer Vacation here and its also known as Crazy Town.  We have so many fun things planned but, oh my, do I hope I keep my head above water.  Ha!

Hope you have a great day and thanks so much for stopping by!


5/21/15

Pin-Sights Challenge

Hey there, crafty friends!  I am so excited to be joining in on this month's Pin-Sight Challenge.  I am stopping in a few hours late...I just got home from last day of school activities, along with 5th grade promotion.  That's right.  Next year I am going to have a middle schooler.  I have shed a few tears today.  Anyway, I am home now and just realized my post didn't go live this morning.  Agh!!

So let's get started!  Here is the gorgeous inspiration photo....

unnamed-2

unnamed

From that, I made this....

IMG_1127

I got a little techniquey for once!  I actually did a little watercoloring....

Untitled

I used the Bold Blossom Stand Alone dies, and then cut out the dies from the watercolored areas....

Untitled

And that gave these blooms such a fun look.  I added in a sentiment from Fancy Thanks, after scoring random score lines on the white card base.  To finish it off, I added in some sequins....

IMG_1128

The Essentials by Ellen Pin-Sights challenge is a monthly inspirational challenge based on a Pinterest Inspired photo that is located on the CLASSroom blog. A random challenge participant will receive a $50 gift certificate to the Ellen Hutson store.


unnamed-3

Stop over to the Ellen Hutson blog to see all the details for playing along with this amazing challenge.  You can link up your creation over there!

Thank you so much for stoping in today!  Hope you have a great day!

5/18/15

Press n Seal Projects...


So I posted a little video the other day on Facebook and Instagram.  I had no idea that so many people would watch it.  It's all about Press n Seal.  If you follow my blog, you've seen me use it several times in the past.  It's good stuff right?  And yes, Jennifer McGuires husband invented it.  LOVE that!  I had lots of questions and comments to go into a little more detail.  So I thought I would stop in and share again!

Here is the very CAS card I made, just using some strips of washi and the sentiment die from Simon Says...

Untitled

Here is the video.  There is no sound.  This is just a quick video in high speed.  My intentions are to post one every friday.  If you have any certain video topics you'd like to see, just let me know.  Otherwise, I will just be sharing random card making ideas.


So with this technique, you can take your die cut, line it up on a grid or grid paper for an even sentiment.  Then you take the sticky side of the Press n Seal and pick up your sentiment.  I used Tombow Mono Liquid glue and put dots all of the back of the die cut.  Because the Press n Seal is clear, you can see where you are placing your sentiment on your card base.  You can center it and make sure your sentiment is straight, before pressing it down.  SO much easier than doing each die at a time, especially if you have lots to line up like this one that I shared last week for the PTI release...

Untitled

Here is the finished project....

IMG_1227

I've had several people email me asking where to get it...normally its just at any grocery store, Walmart, Target etc....but here is a link if you can't find it.....


Here is one more video from last year, just to see another way I used Press n Seal.


Hope this info helps!  Thanks so much for stopping in today!  Have a great day!


5/17/15

Spiffy...

I needed a Grade School age birthday card and I new these Terrific Ties from MFT would be perfect.

May 2015 MFT

I stamped them in Lush Lagoon, Banana Split, Orange Zest and Sour Apple.  Using my Misti, (MFT has Misti's!!!) I lined up the 2 sentiments from the same set.  I cut out the front panel just to add another layer to my card base.  Super CAS and super easy....as usual!

May 2015 MFT

Do you have any fun plans for today?  We skipped church today....shhhh!  Other than that we have quite a to-do list and a Piano recital.  We have had a TON of rain.  And I see sunshine now....so I think I am off to sit on the deck for a little while!  Hope your Sunday is nice and relaxing! 


5/15/15

PTI Release in Review...

Hey there crafty friends!  I have lots of cards to share today for PTI's Release in Review, so hang in there with me!  There are so many new fun sets that are very versatile.

This first card uses the new stamps and dies from the Superhero set.

IMG_1209

I used all of the fun word dies and made the wide faux embossed background.  I added in a circle with some Raspberry Fizz and Orange zest blended in and then stamped the superheroes right on top.  I added in the black strips of card stock behind the circle to ground the image.

IMG_1211

I stamped the sentiment and attached it to the inside and then made a matching superhero mask to go with it....

IMG_1212

To make the mask a little more sturdy, I added 2 "arms" to each side....

Untitled

And then attached them to the back of the mask....

Untitled

I love this next card using the new dies from Center Style: Feminine to make this card, along with a  little Rosie Posie.  The sentiment comes from the set called Watercooler Talk. 

IMG_1214

This next card is from Maile's new set called Southwestern Style.  I sorta geeked out over it.  I love it!  I just stamped this lined image in a pattern with a fun color combo and then added in a sentiment over the top.....

IMG_1220

I made a little polaroid card using the new Petite Places: City Station.  I used the Monthly Moments: Instant Photo 1 die for this card....

IMG_1221

I made a little scene and then turned it into a card....

IMG_1222

Center Style: Masculine is a fun new set with awesome dies.  The set is called Masculine....but I went with a more Feminine card.  I stamped the sentiment from Watercolor set in the center to finish it off...

IMG_1223

I adore the new Enclosed: Star set and dies.  I made this super easy card with a bright color combo...

IMG_1225

If you look really close...it was hard to photograph....I used Hello Sunshine to stamp the rays in the background.  I used the Misti to line up the colored images inside the star so they are pretty much perfect.  Then I added in the white die over the top....

IMG_1226

I made this next card with the new Text Style: Dad die.  I cut the frame from around the outside and then cut the banner out of the new 3 Piece Suit paper pack.

IMG_1227

Once I had the words all lined up, I took some Press n' Seal to pick up the whole thing.  I added some liquid glue to the backs of the letters and then pressed the whole thing down to the card front, attaching the entire thing in one press.  So easy!

Untitled

You can see I also scored the background of the card every 1/2".  This is probably my favorite thing to do to a card....

IMG_1228

I hope you made it through this long post!  To see more of the Papertrey Ink Release, stop over to Nichole's blog for more info! So now that you have seen it all, whats on your list?

5/14/15

Handmade Gifts for Guys

Today's group post for the May PTI Release is a fun one!  It's all about the guys.  First, you will see the card I made and down below, you will see how I cased an older more feminine project and turned that into this card...

IMG_1199

For this card, I used the new paper from the paper pack called Three Piece Suit.  Its a great mix of masculine colors and patterns.   Here is the card I changed from a little more feminine to this masculine "dad's" card.

IMG_0024

It was really easy to change up this card.  Taking those softer colors and making them more masculine.  I took the scribbles die in black and laid that between the card base and this fun stamp and die from the new set called Craft Brew.  I added in a Keep it Simple: Father sentiment to top it off. 

IMG_1200

I turned the coaster into a little gift using a glassine bag and the Wine Bottle Tag.  The coaster fit perfctly into the glassine bag.  I attached the Wine Bottle Tag to the front of the bag after decorating it just a little to match the card.

IMG_1197

They have some coordinating black scribble going on behind the fun sentiment....

IMG_1207

Here is a close up of the coaster I made.  If you check out the background paper I used on my card, you can see the theme here in the coaster.  I used the same colors in the paper, in the floss that I used.  

IMG_1203

I took a square coaster and slide it down inside this felt coaster to make it a little more sturdy.  These are super easy to stitch up and make for such a fun "guy" gift!

IMG_1205

I can't wait to see all the rest of the handmade gifts for guys.  Here are the links for the rest of the team....


Come back tomorrow for a full Release in Review!  Thank you so much for stopping in!


BLOG TEMPLATE BY DESIGNER BLOGS