Showing posts with label Valentine's Day. Show all posts

1/08/15

Reverse Confetti Blog Hop...


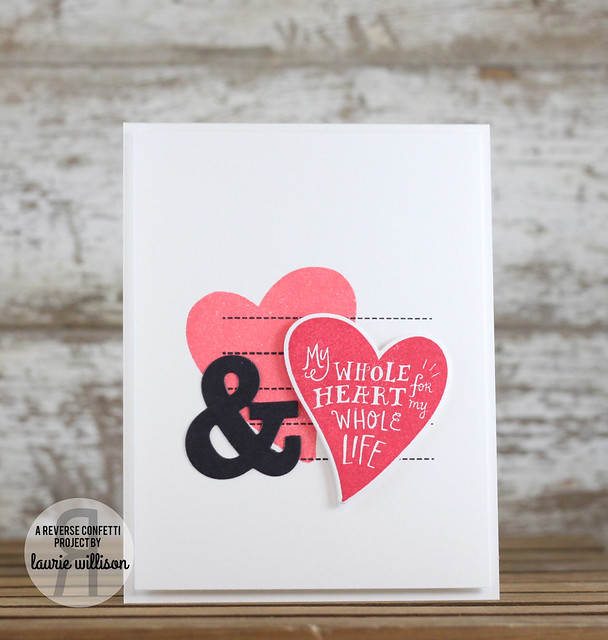
IMG_0209

Happy New Year! REVERSE CONFETTI has just released a collection of new products that will help get you in the mood for some Valentines Day crafting!  So glad you are here today to join us for our new release blog hop


The hop started over on the Reverse Confetti blog, and you should have made it here from Amber’s blog. It would be worth your while to start at the beginning of the hop, so you don’t miss a thing. We have tons of inspiration for you to see using all the new Reverse Confetti stamp sets and dies!
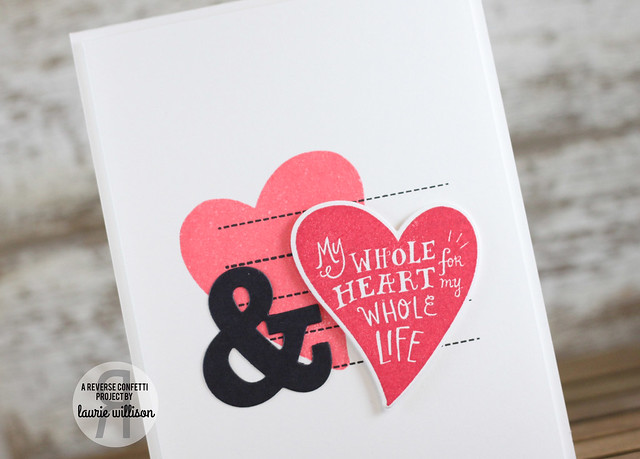
IMG_0210

Here are the new sets I used...


I hope you’ve enjoyed hopping with us today. Be sure and hop with us on the 8th of EVERY MONTH for more REVERSE CONFETTI inspiration! Now it’s time to hop on over to Stacey’s blog. If you get lost along the way, you can find the hop order and list of all the participating designers over on the Reverse Confetti blog.

A few things before you hop along though, just to keep you “in the know”…
November’s SKETCH FOR YOU TO TRY is open for you to play along.  Click HERE for a chance to win and become our newest ‘Fetti Fave! 

Celebrate the creative side of you!


2/08/14

Reverse Confetti February Blog Hop

**Please scroll down to see today's baby blog hop for the sweet, Jinny Newlin!**

Good morning!  It's time for the February Reverse Confetti blog hop.  If you are following along the hop, you should have made it here from my sweet friend, Wida's blog.  If you would like to start from the beginning, stop over to the Reverse Confetti blog.

 I figured since it was February...and since I am having so much fun making Valentines...that I would make another CAS Valentine's Day card...

IMG_1218

I used the small banner from the tag me die set and then stamped the woodgrain from Forever Fall.  I added in a little red heart over the top of the existing heart in the stamp and then covered it with Xmas red stickles.  I stamped the sentiment, from Crushin, in red right below.  Super CAS!

IMG_1220


I know there is lots more fun stuff to see today.  Your next stop is Lisa Heinke.  I am sure she has something gorgeous made up for us today!

Thanks so much for stopping by!  Have a great weekend!

2/05/14

The Card Concept #3...

Hey there!  I am here today with a card for this weeks Card Concept #3.  I am really to be guest designing for the month of February.  

This challenge was to use monochromatic pink.  I pulled 2 different shades of pink from the picture and made a striped background with a stencil from Simon Says, blending darker to lighter.  I used a part of a die cut from Heart in a box and then the small love you die, layered on top in a soft gray card stock.  

IMG_1178

It's hard to see but I added in some vellum hoping to mute the colors just a tad.  


IMG_1183

So that is it for my first Card Concept creation.  This challenge is bi-monthly so I will have one more coming up in 2 weeks!  I hope that you get the chance to play along!  There is a lot of amazingly talented girls on this team, so stop by The Card Concept blog and check them out!

Thanks for stopping in!


Supply List: 

2/02/14

Heart Shaker Card...

So I was checking out the Simon Says blog the other day and came across this now very famous video by Laura Bassen.  It's amazing.  As always.  Her shaker card was awesome.  So I had to make one too....

IMG_1212

  Here is a quick run down of the how I made the card...

1.  I cut 2 pieces of card stock 5 1/4"x3 1/2" and used my Corner Chomper to cut 1/4" rounded corners.  

2.  Using the Simon Says die called Heart in a box, I centered the die on one piece of card stock and then washi'd it down so it would stay, to make the top layer.

3.  Then I glued a piece of acetate using Tombow Mono Liquid Glue to the back of the die cut piece to make the window.  

4. Next, I lined the edges of the 2nd piece of card stock with thin cuts of foam tape.  

5. I used the Mini Hearts die to make a BUNCH of hearts.  It cuts 9 different size hearts out, so I ran it though 3 times on 2 different pink colors of My Favorite things card stock.  

6. Then I used the Simon Says Diagonal Striped stencil to make some pink strips by taking a sponge dauber and applying color.  I used Amuse Bubblegum and Sugar Fresh Ink.  

7.  Last,  I ran the heart die over the striped piece of card stock another 3 times.  I added in some sequins from Neat and Tangled to give it a little shimmer! 

8.  I ATG'd the shaker box to the front of the pink card base to finish the card.

(All supplies linked below)
IMG_1217

Sadly, when I completed this card, there was no one to dance with....as Laura did in her video.  But I can see how fun these are and why they can bring so much happiness!  :)

I'm thinking the is the perfect valentine for my daughter!  I can't wait to give it to her.  Thanks so much for coming by today!

~Laurie

PS... Go check out all of Simon Says Stamp's Valentines Release by clicking HERE
 Lots of fun stuff!  :)

PSS....Go Broncos!


Supply List:  

1/24/14

XOXOXO

I am so in the Valentines mood.  If you have noticed...ha!  My last several cards have been light gray, white with a red heart.  I almost did the same again so I figured I better change it up....by leaving out the gray.  :)  Instead, I used Vellum.  And a technique I have been seeing around.  Sewing down the middle of the words....so fun, right?  The last card I saw was by Laura B...amazing!  Here is mine...

IMG_1132

I used the end of the border die and cut 2 (out of vellum) so the X's would be perfect.  The O's were easy to trim up.  Then I stuck them down with a little adhesive and sewed down the middle.  I added the little heart by popping it up on foam.  I attached the card front to the card base with some more foam.  It's all about the foam really.  How would I make a card without the stuff?

IMG_1135

If you haven't see the Simon Says Stamp Valentines Day release, you need to!  :)  Click HERE to see the whole thing!

Thanks for coming by today!


BLOG TEMPLATE BY DESIGNER BLOGS