Hey there crafty friends! Thanks for stopping in today! It's Day 1 of Group Posts over at Papertrey Ink and we have some fun stuff to share today! It's all about the new Tiny Town Sweet Shoppe.
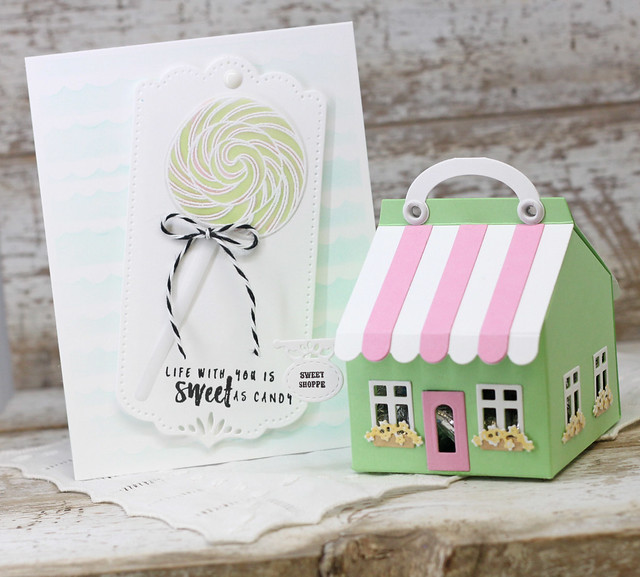
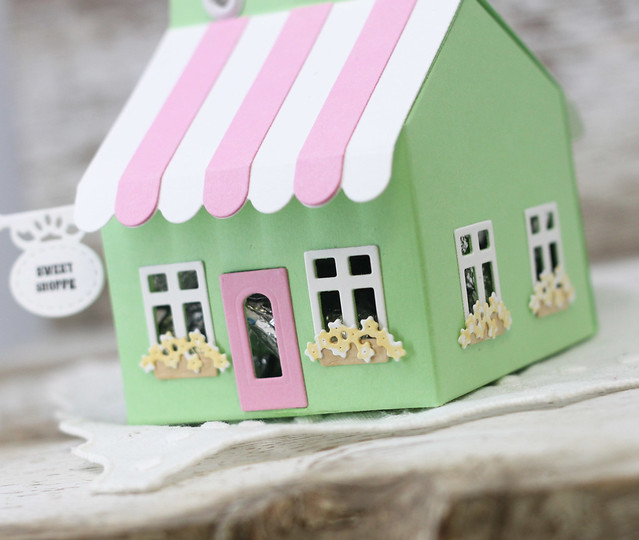
For my project, I created a little candy box full of hershey's kisses!
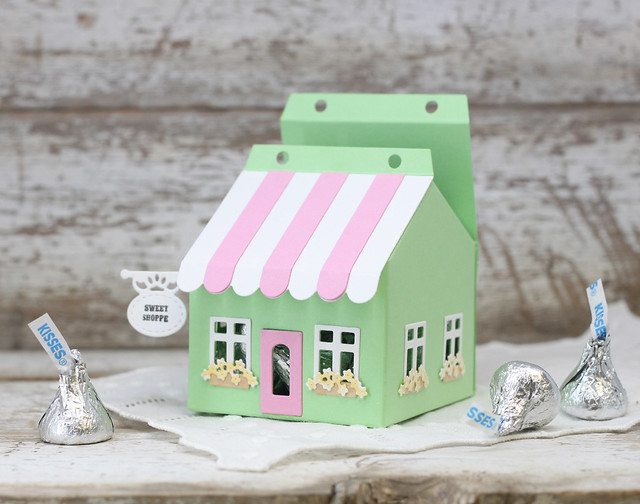
The dies are an addition to the Tiny Town: Basics Die set. Adding in the adorable awning and the window boxes and flowers....so fun!
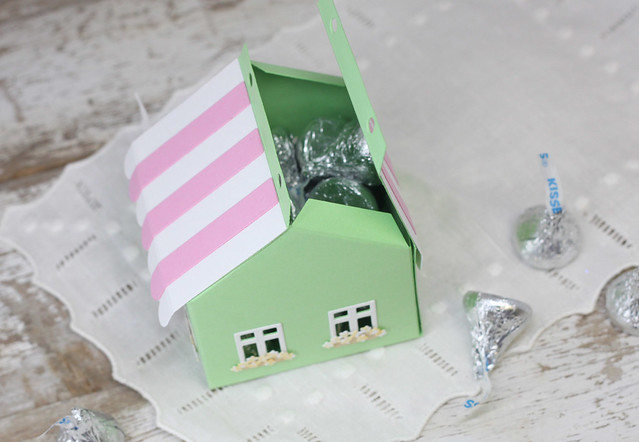
I finished the box and attached the front of the awning to the box, leaving the back flap open and without adhesive.
I used brads and my crop-o-dile to close the box with the handle that comes with the basic dies.
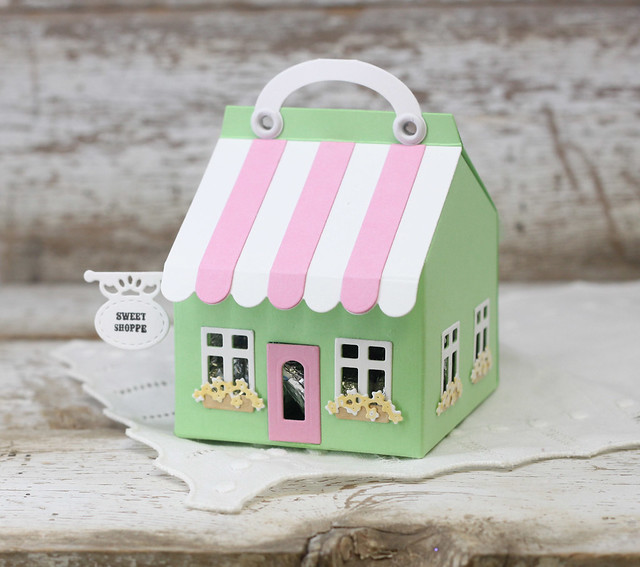
I love the all the little details you can add on. I cut the window boxes and flowers out of white and then colored them with Copics to make it even easier.
I created a card with the sweet theme, as well.

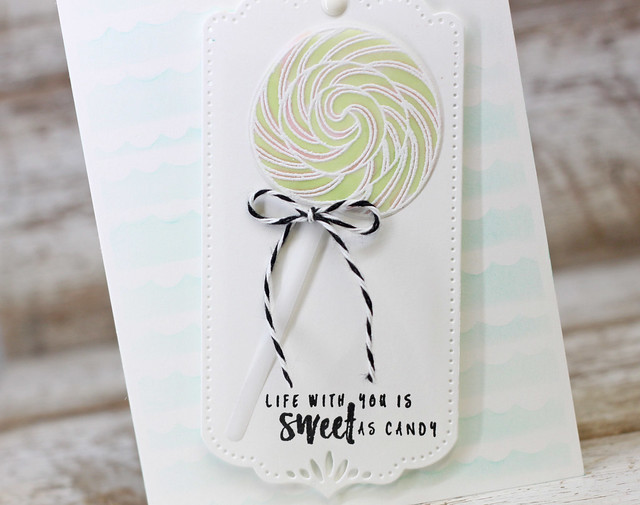
In the background, I used the new Banner Cover Plate to create a mask and then used my Clarity Stencil Brushes to add in some light color. I heat embossed a lolly pop on vellum and added in some Copic color on the back. I attached to Basic Bookmark 3 die cut. I stamped the sentiment, added in some twine and then put the focal point on to the stenciled card base.
Head over to Nichole's blog to see what the rest of the Design Team has for today! Thanks so much for stopping in!

For my project, I created a little candy box full of hershey's kisses!

The dies are an addition to the Tiny Town: Basics Die set. Adding in the adorable awning and the window boxes and flowers....so fun!

I finished the box and attached the front of the awning to the box, leaving the back flap open and without adhesive.
I used brads and my crop-o-dile to close the box with the handle that comes with the basic dies.

I love the all the little details you can add on. I cut the window boxes and flowers out of white and then colored them with Copics to make it even easier.

I created a card with the sweet theme, as well.

In the background, I used the new Banner Cover Plate to create a mask and then used my Clarity Stencil Brushes to add in some light color. I heat embossed a lolly pop on vellum and added in some Copic color on the back. I attached to Basic Bookmark 3 die cut. I stamped the sentiment, added in some twine and then put the focal point on to the stenciled card base.

Head over to Nichole's blog to see what the rest of the Design Team has for today! Thanks so much for stopping in!
Supply List:


Super cute and fun projects, Laurie!
ReplyDeleteSweet new looks!
ReplyDeleteBeautiful card and adorable sweet shoppe!
ReplyDeleteSweet!!! 😍
ReplyDeleteI love the little house with the carrying handle. It is adorable. I like the soft colors on the card and you sure make CAS look good.
ReplyDeleteAdorbs, Laurie! Your cute little sweet shop reminds me so much of delicious ice cream flavors. Your lollipop card is so sweet on that bookmark die and looks great on your inked background.
ReplyDeleteHi Laurie,
ReplyDeleteA.D.O.R.A.B.L.E.
Cariños,
María Alba
Love both your projects ,Laurie! The house is just darling and I like the handles !
ReplyDeleteVery cute projects Laurie! Nice colors and I love the candy kisses in the Sweet Shop box! What a nice little treat for someone you love!
ReplyDeleteI want my little shop filled with chocolate!!
ReplyDeleteGRACIOUS! My birthday list is getting LONGER & LONGER with this release! LOL I LOOOOOVE what you've done Laurie! That little Sweets Shop is SO SWEET! AND the Sweets Card too!!! ;)
ReplyDeleteNow who wouldn't love a box as cute as this full of Hershey's Kisses!! Pretty card too. Catching up after vacation and took a peek at what I missed on your blog. LOADS of fabulousness happened!!
ReplyDeleteLovely soft colors on both your projects. The lollipop is just WOW.
ReplyDeleteI know you are busy ,I was wondering if you put the handle on one side so it would still open ...or what ?
ReplyDelete