12/16/15

An MFT Hello and a Video Tip...

I played along with the MFT Card Challenge Sketch today and wanted to share.  First off, here is my card...

Print

I used the Stitched Alphabet and a few copics to color this rainbow hello.  Then I added in some stitched banner tails in vellum.  I adhered this all down to the white card base that I scored every 1/2".    I have a video linked below to show you a little press n seal tip that make for lining these dies up and gluing them down in one quick swoop.  :)

Print


Here is the sketch I used:


So glad you could come by today!  Have a great day!


Supply List:  

12/15/15

PTI Release in Review...


It's release day over at Papertrey Ink!  Lots of fun new goodies this month that will be available to purchase tonight!

I saw Maile's new set called Fresh Floral Wrap-Ups and instantly thought this would be fun.  I made an umbrella with the handle die cut from the Scattered Showers die.  I added in some random score lines and a small strip of black along the bottom (Maile inspired) and then finished it off with some Raindrops and a sentiment.

IMG_2523

This next card showcases the Keep it Simple: Love and the "love" die from the XOXO set.  I added in some Pure Poppy Pattered paper and some red tickles over the heart stamp to finish it off. 

IMG_2482

I love this XOXO set!  The coordinating dies are FABULOUS!  I randomly stamped these conversation hearts and then cut them out along the border and even the little pieces in between.  I popped that panel up on the card base with foam tape and then added in the sentiment in white cardstock, stacked up 4 times.  

IMG_2519

This next card uses Enclosed: Heart.  I just placed the heart outline on some white cardstock stamped with stripes from Background Basics: Super Stripes.  I added in a little red heart on the side.

IMG_2539

Inside, I stamped the Tucked In: Wedding stamp.....

IMG_2543

This card uses the new Two-Toned stamp set which I adore!  I stamped the bottom of the card in Swirls and Stitches and then added in the die cut two-toned piece.  The bottom is stamped in gold and the top in Hawaiian Shores.  I covered the line with a strip of black cardstock and finished it off with the sentiment.

IMG_2545

Last, there is a fun little freebie this month.  Stop over to Nichole's blog to get the details!  I did a....stamp in Simply Chartreuse, spray with water, stamp, repeat.  Several times.  hehe!  Then I added in the black "happy" stacked up about 4 times along with a stamped sentiment. This little set is a cute one you don't want to miss!

IMG_2548

So stop over to Nichole's blog for more details.  Today is the big day!  Do you have your wish list ready to shop?

Thanks so much for hanging out with me this week.  I appreciate your comments and your visits!  have a great day!

12/14/15

Love All Ways...


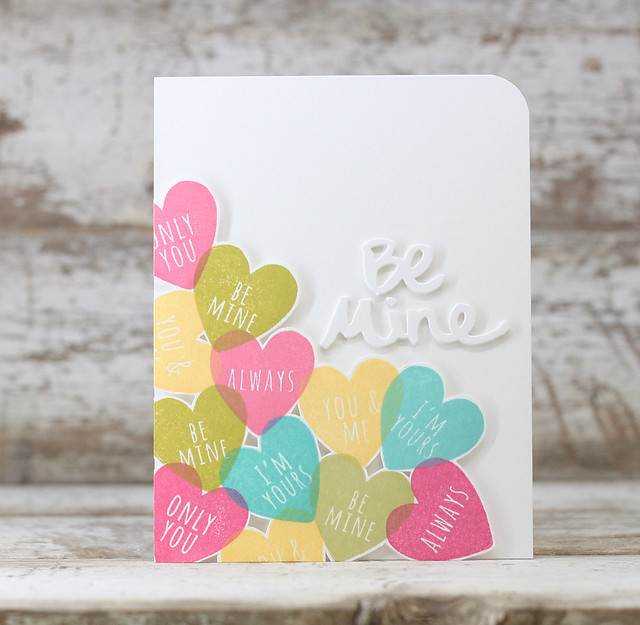
It's our last day of Group Posts for the December Papertrey Ink Release.  Today's post is all about Love.  :)  We are showcasing the new sets called Be Mine, Valentine and the new Valentine Pin-Up Kit.  

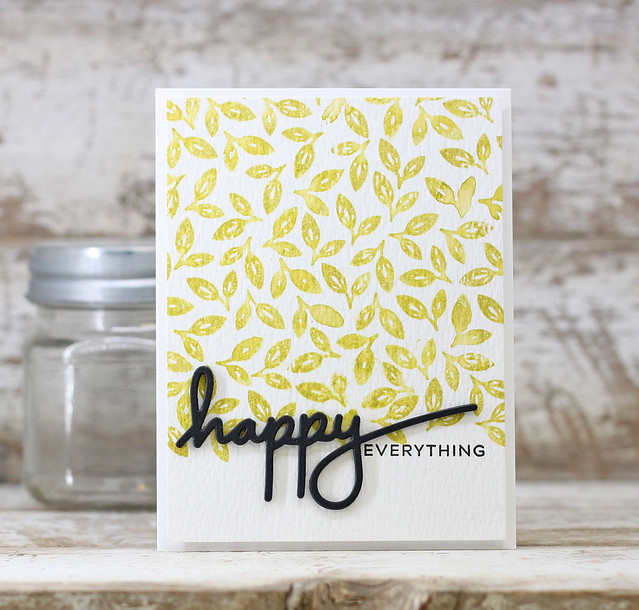
These first 2 cards show how to use the Be Mine, Valentine set in 2 ways.  One Birthday card, followed by the Valentine Card....

IMG_2475

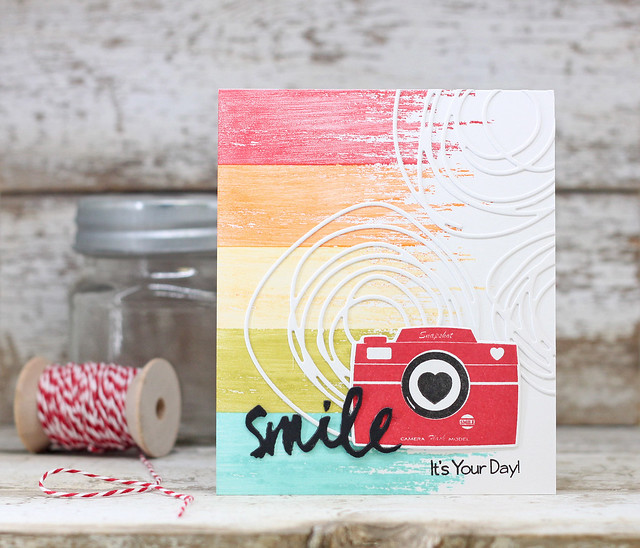
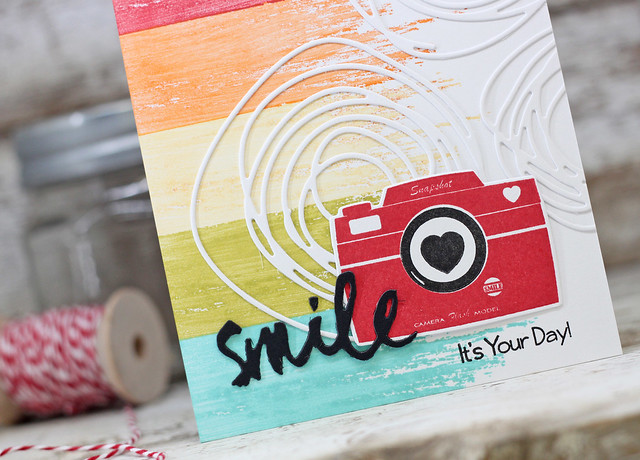
On this first card, I used the Brushed Off stamp set along the side of the card in rainbow order.  Next, I took 3 of the Scribble  dies and attached them to the base of the card.  I added in the camera from the Be Mine set, along with the Smile die from the Wet Paint III set and a sentiment from the Give Me a Hand set.

IMG_2477

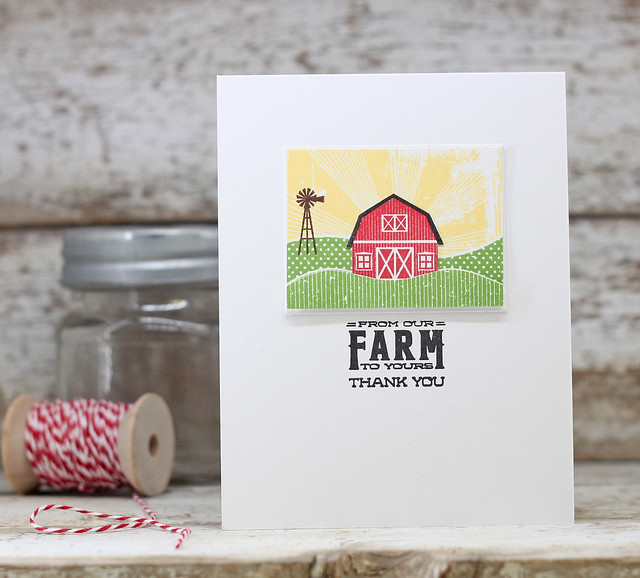
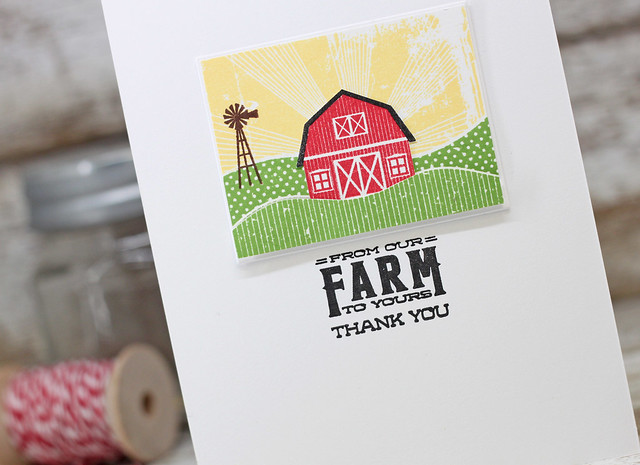
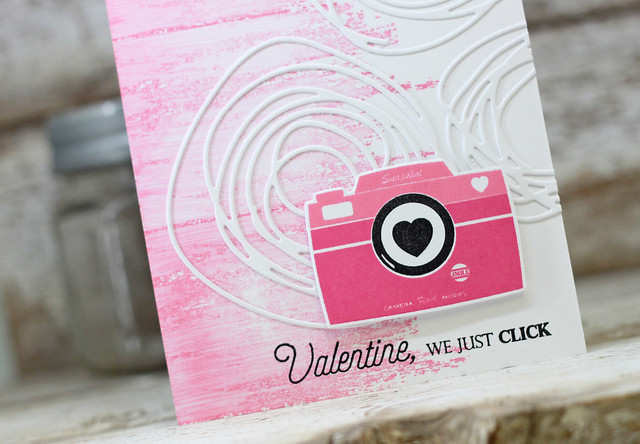
This next card is basically the same layout but for Valentines day.

IMG_2493

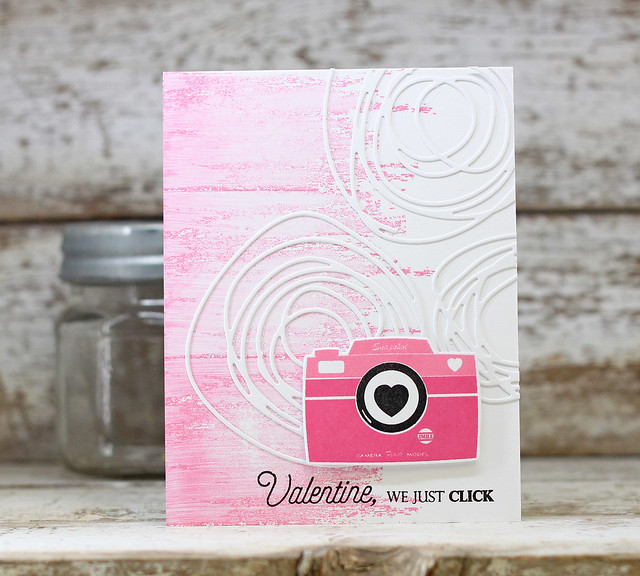
I stamped the camera in Raspberry Fizz and Hibiscus Burst and then stamped the sentiment from Be Mine along the bottom.

IMG_2495

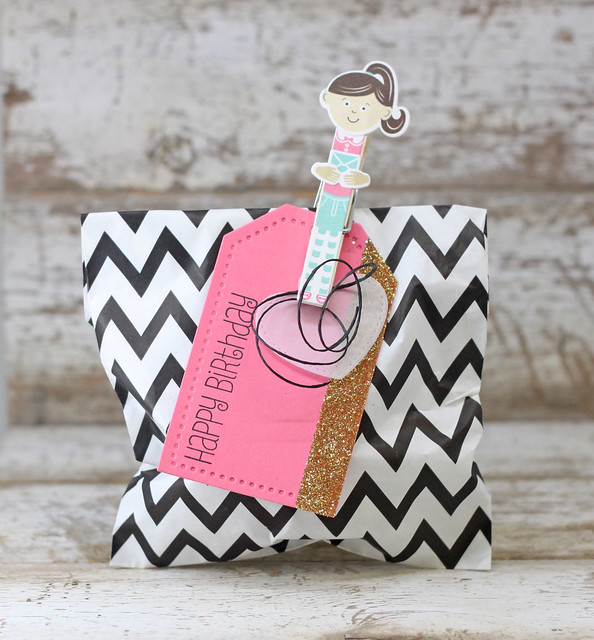
These next 2 projects showcase the Valentine Pin-Up set.  I have one Valentine and one birthday.

IMG_2537

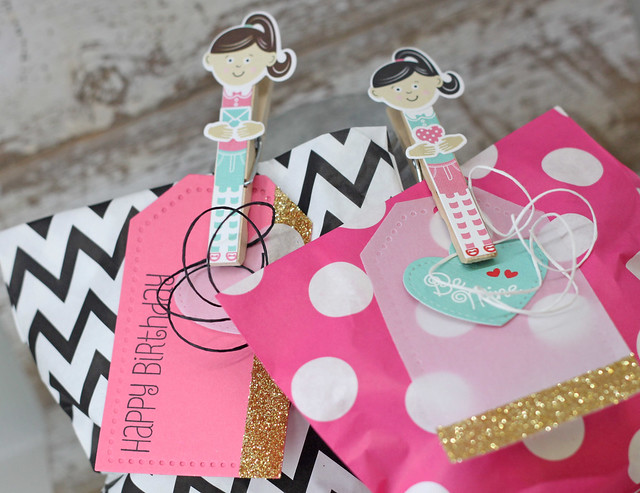
This first one is a simple clip made with the paper pack included in the kit.  I added in a vellum tag dipped in gold glitter and clipped up a heart tag from the set, along with some curled up, scrappers floss.

IMG_2532

This next one is the same basic project but with this paper pack being so very versatile, it is easy to make a little gift for any occasion.  I cut the heart tag that I used above from vellum and then cut the same tag from above in Hibiscus Birthday paper.  I dipped it in gold glitter too, after stamping the sentiment from Ballerina Beauty.  I added in a little curled up black scrappers floss here too.  Looking at this photo, the floss looks a little crazy, but in person its a fun little curled ribbon look.  lol!

IMG_2530

So that is it for today.  The whole release in review will be up tomorrow so stay tuned for more.  Hope you are having a great day!

Kay Miller
Amy Sheffer

12/13/15

Barnyard Edition...

Today is all about Petite Places: Barnyard and Sentiments over at Papertrey Ink.  These new additions to the Petite Places line are SO adorable!  I have a quick and easy card to share with you today!

IMG_2478

I pulled out my On the Farm set because I knew I had to use this sunny background with those rolling green hills.  I stamped and cut them out separately and layered them on a small white mat.  I stamped the windmill in Dark Chocolate and then cut out the barn and tucked it down inside the hills.  I stamped the 2 sentiments from Petite Places: Barnyard Sentiments on the card front and then added in the stamped image right above.  

IMG_2479

We have one more fun set of projects to share tomorrow before the big release.  Hope to see you then!


12/12/15

Gem Inspirations...

Good morning!  Welcome to the first Group Post of the December Papertrey Ink Release.  Today we are showcasing some stamps and dies that are all Gemstone related.  I have a couple CAS projects to share today, starting with this card...

IMG_2485

I did a background wash of Aqua Mist and then simply layered the stamps and gem diet on top. The sentiment is from You're a Gem.  The gem, which is from Cover Plate: Gemstone Die, is cut out of Silver Adhesive paper, layered with a dark Aqua Mist watercolored paper.  It's hard to see the sparkle but I also colored in the gem with Wink of Stella.  

IMG_2487

I made a coordinated Tag using the stamp set Charmed.  

IMG_2490

I used the smaller gem die cut from the Cover Plate: Gemstone Die, also in Silver Adhesive Paper.  I stamped the sentiment and tied a silver floss knot at the top of the tag.  

IMG_2491

There is lots more to see this month, so I hope you will stop back by tomorrow.  Thank for coming by today!

Kay Miller
Amy Sheffer
 
BLOG TEMPLATE BY DESIGNER BLOGS