1/15/15

PTI Release in Review...

So today is the day!  Do you have your wish list all ready to go?  So many fun new stamp sets and dies for this month's PTI Release.  Here are a few more projects to show you the rest of the new goodies.

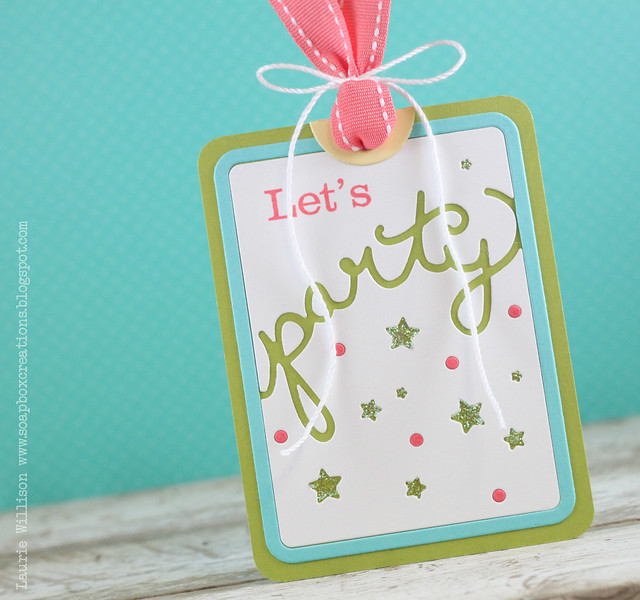
Using the new Phrase Play, I made a fun little tag....

IMG_0314

I cut one out in white and one in Hawaiian Shores.  I layered them up on a piece of Simply Chartreuse and then added in some Berry Sorbet dots.  I filled the stars with Stickles and then added the top tag reinforcer die from Tag Sale #3 die.  I finished this one off with some Berry Sorbet Saddle Stitch and white twine.   

IMG_0316

Cable Gram is the another adorable set that you can personalize several different ways.  I chose to make a birthday card...

IMG_0311

I stamped the car in Hawaiian Shores, Simply Chartreuse and Berry Sorbet.  I added in a tail light in Lemon Tart and a little piece of cable car tracks in kraft.  To ground the whole image, I added in a few strips of card stock to match.  

IMG_0312

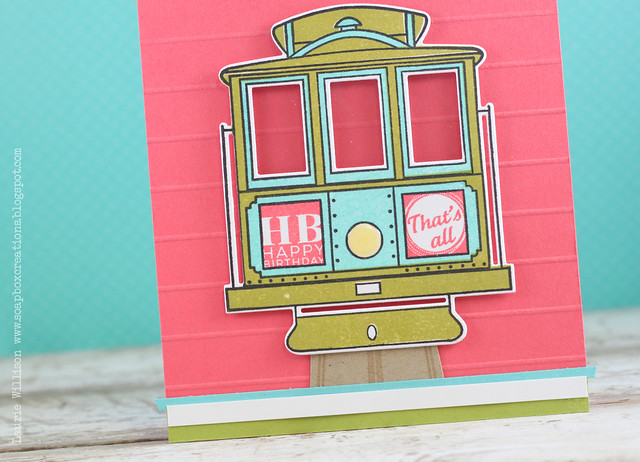
I also added some clear card stock to the windows...

IMG_0308

Instead of making a card with the Happy Notes set, I made some...notes.  :)


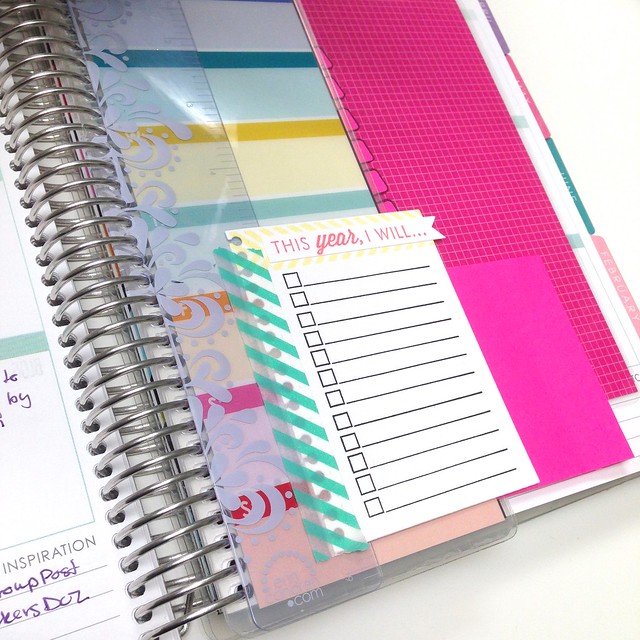
I am a chronic list maker.  And bullet lists make me happy.  I used the Monthly Moments: Spiral Journal card to make these fun little notes for my planner.  I stamped the tops in different colors and then added in the bullet lines.  For the one above, I took a sentiment from Monthly Moments: January to make a "this year, I will" list.  I use Washi tape to attach them to the ruler inside my planner and then I see the list overtime I open it up.  


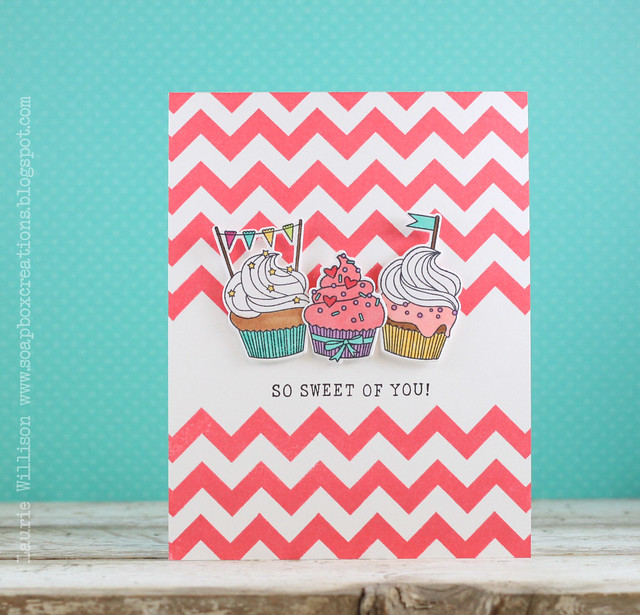
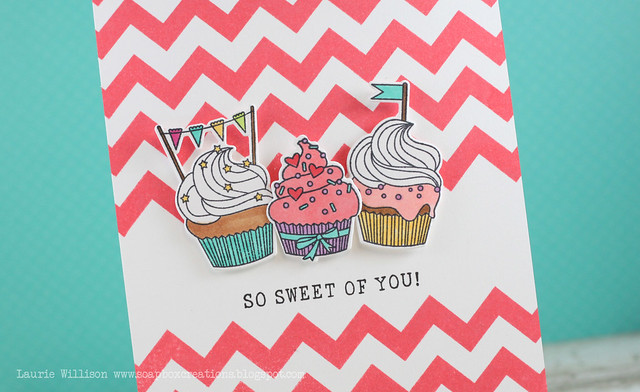
This next card features three sets....Hey Cupcake, Stitched Swirls and Keep it Simple:  Belated Birthday.

IMG_0296

I stamped the swirls in Hibiscus Burst and then added in the sentiment.  I use the cupcake die from Lexi's new set and stamped the different parts of the cupcake.  I layered the top with Stickles to finish it off.

IMG_0297

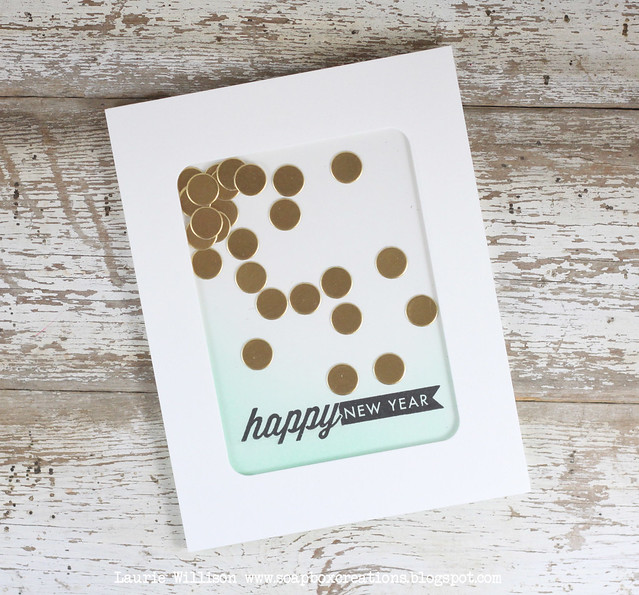
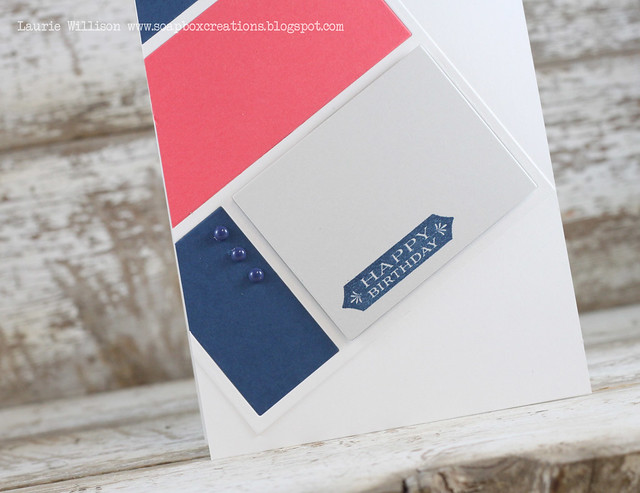
For this last card, I used the new Comic Strip Cover Plate to do a little color blocking.  I stamped a sentiment from the set called 2015 Birthday Tags....

IMG_0350

I cut out the cover plate and attached it to the card front.  Then I cut out 2 more cover plates in Enchanted Evening and Berry Sorbet.  (Can you tell by now that Berry Sorbet is my favorite color?)  I pieced it all together and stamped the sentiment in Enchanted Evening.  To finish the card, I added in some enamel dots.

IMG_0352

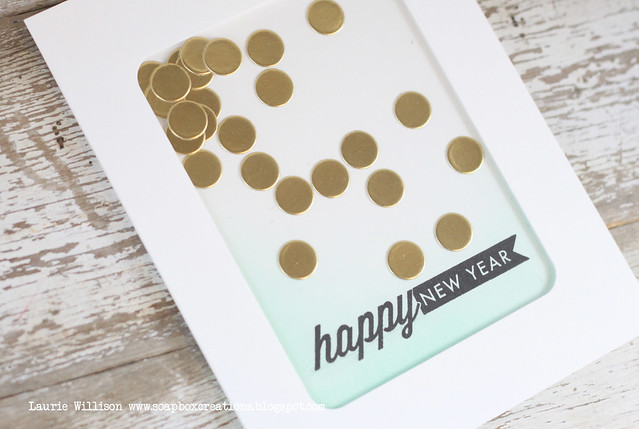
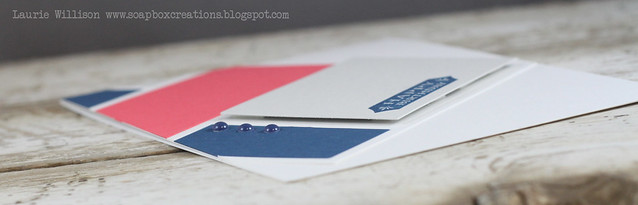
Here is a close up of the card to see the dimension of the popped up pieces.

IMG_0323

So that is it for today!  I hope you have enjoyed my cards for the January PTI Release.  Stop by the rest of the DT to see what they have for today!


Have a great day!

1/14/15

Introducing Baker's Dozen...


One of my most favorite things is cake.  I love cake.  You know that amazing white wedding cake?  Yeah, I love that stuff.  So when its put into a compact little cake, that makes it even better.  Who doesn't love a good cupcake?  :)  Today's Group post for the PTI Countdown is all about just that.
A Baker's down.  And even better?  There is ZERO calories here people.  (insert thumbs up)

My first card showcases the adorable cupcake for the Month of May.  My birthday month!  :)

IMG_0288

I kept the coloring simple....like I alway do...and just added a touch of gray to the icing.  I actually attempted some shading on the cupcake and the cherry!

I also used the Layered Banner Bantered on this card. (This banner die?  Amazing.)  I cut the first piece out of Soft Stone patterned paper and the top out of white card stock.  Super easy and CAS!  

IMG_0290

This next card was fun to make!  I talk a lot about my inability to color so i'm usually scared of stamp sets that need to be colored....but this time I was pretty excited.  These are so easy to color in a simple one layer look.  I realized i didn't need to stress over using 3 copics and starting with the lightest and all the blending etc...  I just colored a solid color and let it go.  Let it go.... (its ok if you want to sing now!)

IMG_0293

I stamped the background with some Berry Sorbet and a little Background Basics: Super Chevron.  LOVE.  Then I added in 3 more cupcakes up on foam tape.  I took one of the arched sentiments and straightened it out on my acrylic block and stamped in straight.  Love that simple typed font!

IMG_0295

Thank so much for coming by again today! I have been proof reading in triple time on this post so I promise no more talk of yardsticks.  Just card stock!  :)  Auto-correct hates me.  hehe!

Check out the rest of the cupcake creations today!

Nichole Heady
Betsy Veldman
Heather Nichols
Dawn McVey

Stop back in tomorrow for the Papertrey Release in Review.  Have a great day!

1/13/15

Introducing Secret Agent & Zappy Birthday...

I am really excited about today's Papertrey Ink Countdown post.  These 2 sets today?  Fabulous.  And the dies?  So fun.  So lets get started!

My first card was made completely with these supplies:

Zappy Birthday
Zappy Birthday Dies
Cover Plate: Comic Strip (FUN!!)

IMG_0299

To get started, I cut the cover plate out with an adhesive sheet and attached it to the card base.  I masked off each comic strip square and did a little inking.  I used from top left:

Hawaiian Shores, Raspberry Fizz, Lemon Tart, Plum Pudding and Hibiscus Birst.  These inks blend fabulously.

Next, out of white cardstock, I cut another cover plate again.  The WOW and BAM dies x 5 each.  The little building scene x 5 and then 2 of the text bursts.  I stamped the fun images on the text bursts with the outline in black.

IMG_0300

I glued all those word dies together to get a nice 3D look and then glued them down.  Next, I stacked up the buildings and did the same thing.  I stamped some polkas in 2 of the boxes that I wanted to leave empty and then covered the whole thing with a cardstock cover plate.  I stamped the word bubble and the "Zappy Birthday" and attached them down.   Last, I attached the text bursts.  I don't know if they are really called text bursts.  But that is what I am calling them today!  

IMG_9997

So fun right?  I love that set!  I am going to use this a lot!

The next project is another birthday card made from the new Secret Agent.  I left this project to be fairly true-to-color for your average Top Secret file.  You know.  Since I know all about that Secret Agent stuff.  ;)

Here is the front of the card....

IMG_0260

Simply stamped the Top Secret image in Pure Poppy on white card stock and cut it out for more of the "tape" look.  Then I stamped the Restricted Access first in black ink and paperclipped (and glued) the Top Secret Tape down.  I did all of this AFTER, of course, I made a little file folder out of the Fine Linen card base.  I used the most adorable edger dies for this.  You can find them HERE.  

IMG_0261

Next I took a 4' x 5 1/4" piece of what card stock and stamped several images on the inside....

IMG_0262

I used the magnifying glass die to for a fun addition to this file.  I cut it out in kraft card stock and then used the woodgrain impression plate for a little more detail.

IMG_0265

All of these stamps come with the set to make the perfect Secret Agent file.  I finished it off, by simply stapling inside the card base.  

IMG_0266

There is even a set of Secret Agent glasses to go along with this set.  I decided that I needed my own pair in Hawaiian Shores instead...

Untitled

Hope you have enjoyed today's projects!  I can't wait to hear what you think!  Stop back in tomorrow for another round of Group Projects!


1/12/15

Monthly Moments: January

Welcome to day 3 of sneaks for the January Papertrey Ink Release.   Today we are showcasing Monthly Moments: January.  There are lots of fun images in the stamp set, a great new Journal Card and an adorable paper pad this month.  

Here is a quick card I whipped up using some of the new goodies.

IMG_0256

To start this  card, I used some Aqua Mist ink and blended in on the card base.  I took another piece of card stock and cut a window using the new Journal Card 8 Die.  I added a piece of clear card stock and some foam tape to make the shaker card.  I stamped the sentiment in black on the card base.  Next, I used the same Journal Card 8 die to make the confetti out of gold cardstock.  I thought this would be a great color mix for a New Years card.  I put each piece on the acetate, gold side down and then put the card base on last.  

IMG_0257

This new Journal Card die is very versatile and I can't wait to use it on another card.  I have the Journal Card in gold now that I used all these little pieces.  It is sitting here so pretty and I really think I need to make another card out of it.  :)

Check out the rest of the team.  I am sure they have some beauties waiting!  Thanks for stopping in!

Nichole Heady
Betsy Veldman
Heather Nichols
Dawn McVey
Melissa Phillips
Erin Lincoln
Maile Belles
Laura Bassen
Danielle Flanders
Ashley Cannon Newell


Come back tomorrow for our Group post.  Lots of cute stuff for January!  


Supplies:

Stamps: Monthly Moments: January
Paper: Stampers Select White, Clear Cardstock, Gold Card Stock
Ink: Aqua Mist, Versafine Black Onyx
Misc: Journal Card 8 Die

1/11/15

RC SFYTT...

Hey there!  I'm stopping in with a sketch card for January's SFYTT over at Reverse Confetti.  I used some new release goodies for today's card...

IMG_0215

I used the new die from Documented for the panel.  I stamped flowers from Love Blooms and the sentiment from Here's the Story.  I added in the lines from the set Right here Right now.  To ground the card, I added in some score lines on the card base and then finished if off by tucking a little arrow die behind the front panel.  That little die is from Documented, too.

IMG_0216

I used 2 little enamel dots in the center of the flowers for a little more detail.

Here are the sets I used....


Here is this month's sketch...


Stop over to the Reverse Confetti blog to play along.  I can't wait to see your cards!  Thank you for coming by!

 
BLOG TEMPLATE BY DESIGNER BLOGS