Welcome to the Paptertrey Release in Review. I have several cards to share today and I can't wait to hear what your thoughts are on this release.
This first card showcases the new set called Blue Skies. This set is so much fun and I love the images included.
Stamps: Blue Skies Paper: HIbiscus Burst, Pure Poppy, Orange Zest, Lemon Tart, Simply Chartreuse, Hawaiian Shores, Plum Pudding, White Ink: Versafine Black Onyx Misc: Blue Skies Die ~~~~~~~~~~~~~~~~~~~~~~~~~~~~~~~~~~~~~~~~~~~~~~~~~~~~
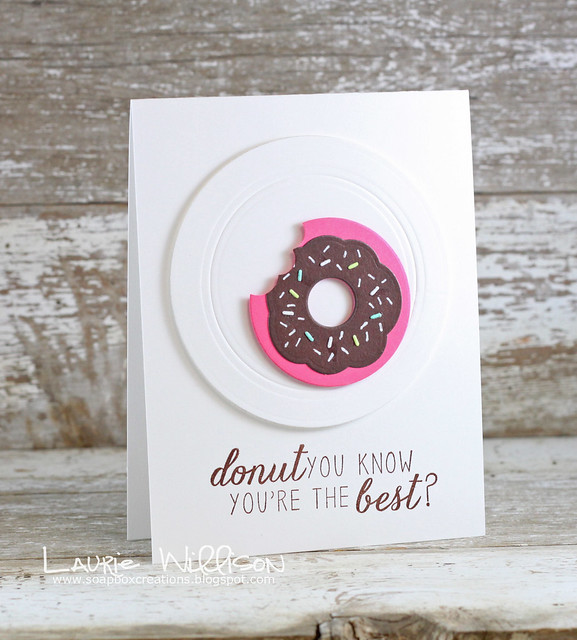
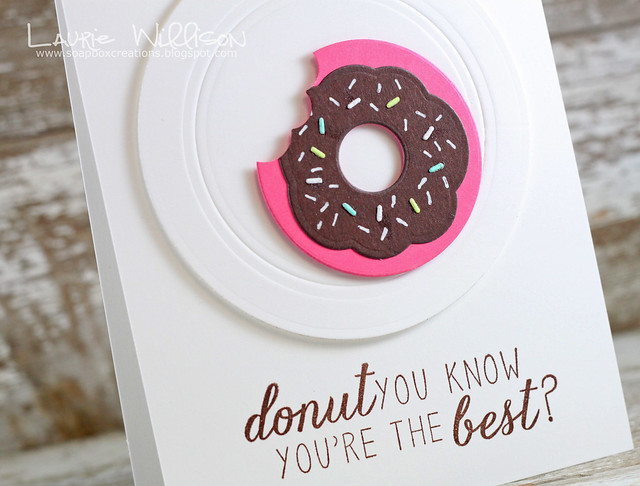
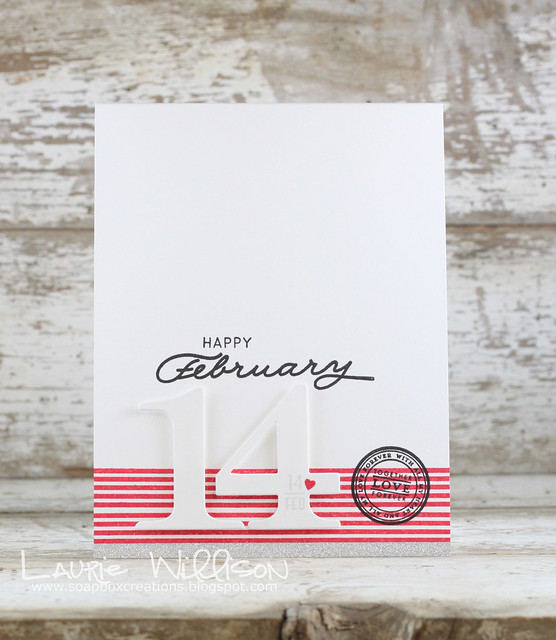
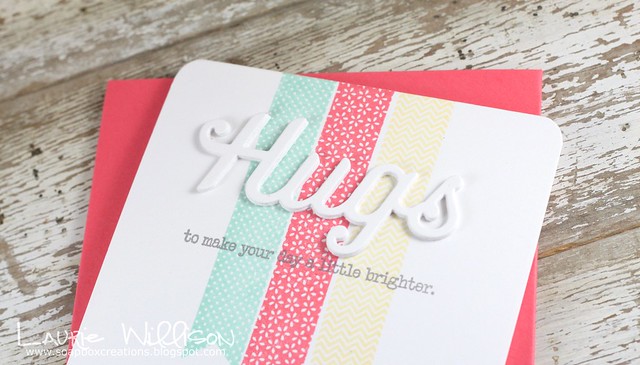
This next card uses the Monthly Moments set: Year Round Mini. I love the font on this set.
Stamps: Monthly Moments: Year Round Mini, Background Basics: Super Stripes, With All My Heart Paper: Stampers Select White Ink: Versafine Black Onyx, Pure Poppy, Provencial Gray Fresh Ink Misc:By the Numbers dies, Glitter Tape
~~~~~~~~~~~~~~~~~~~~~~~~~~~~~~~~
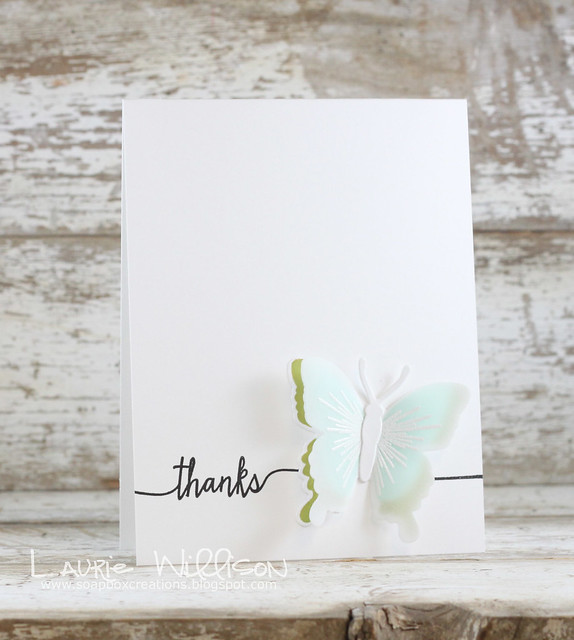
Swoosh is a new favorite set of mine. Anything Maile makes is a favorite really! And those Beautiful Butterfly Layers? Gorgeous!
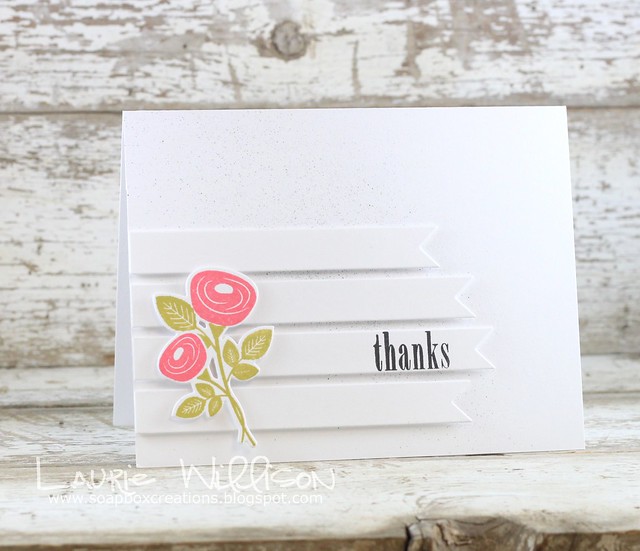
Bitty Bouquets is so pretty. Those bouquets are so easy to line up on the dies.
Stamps: Bitty Bouquets Paper: Stampers Select White Ink: Versafine Black Onyx, Simply Chartreuse, Berry Sorbet Misc: Bitty Bouquest Dies, Double Ended Banners, Black Copic, Spray Mister
~~~~~~~~~~~~~~~~~~~~~~~~~~~~~~
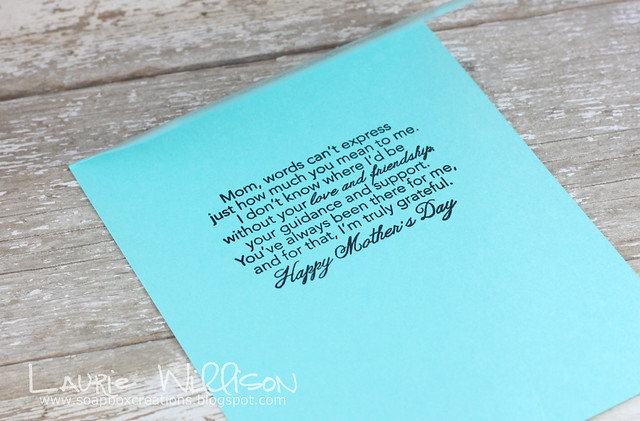
This next card was fun to make. I layer up some of the new Dotted Vellum behind the Quilted: Spring die and then added in the bloom. I also used Keept it Simple: Mother for the sentiment....
and the new Tucked In for the inside...
Stamps: Quilted: Spring, Keept it Simple: Mother, Tucked In Paper: Hawaiian Shores, Stampers Select White, Sheet Basics Vellum Ink: Versafine Black Onyx, Pure Poppy, Simply Chartreuse, Lemon Tart Misc: Quilted: Spring Dies
~~~~~~~~~~~~~~~~~~~~~~~~~~~~~~
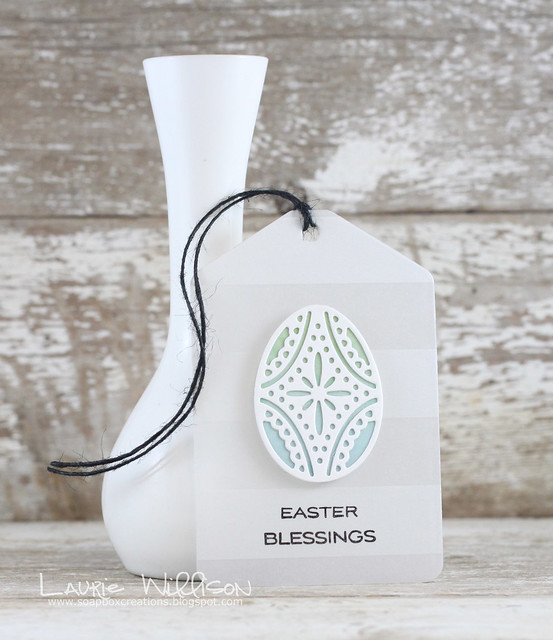
I used some striped Vellum here for a tag. Then I added in a sentiment from Etched Easter Eggs and a die cut egg....
Stamps: Etched Easter Eggs Paper: Sheer Basics Vellum, Stampers Select White, Simple Stories Ombre Patterned Paper Ink: Versafine Black Onyx Misc: Black Twine, Etched Easter Egg Dies, Tag die
~~~~~~~~~~~~~~~~~~~~~~~~~~~~~
This last tag showcases the new set called Easter Alleluias. I made a little chalkboard effect here and added in a tiny bloom from Bitty Bouquets.
Stamps: Easter Alleluias, Bitty Bouquets Paper: True Black Ink: Veramark, Winter Wisteria, Simply Chartreuse Misc: Twine, Filigree White Embossing Powder
~~~~~~~~~~~~~~~~~~~~~~~~~~~~~~~~
So that is it for today! Stop by these links to see more of the February Papertrey Ink Release.
Thanks so much for hanging out with us for the last week. I have had so much fun! Happy 8th Anniversary to Papertrey Ink! So honored to be apart of it!
You may have heard a squeal. It was me. I've been waiting for today for like, ever. Know what day it is? Planner day! Today Papertrey Ink is introducing...Moments Inked Planners.
If you follow my blog you know I am a planner fan...planner nerd...self admitted so its ok! This planner is a fabulous mix of planner and memory keeper. It's unlike anything I have seen before and I feel SO honored to be a part of the Moments Inked Team. Even more exciting? I have some of my own concepts that Nichole has turned into amazing stamp sets and dies to share today!
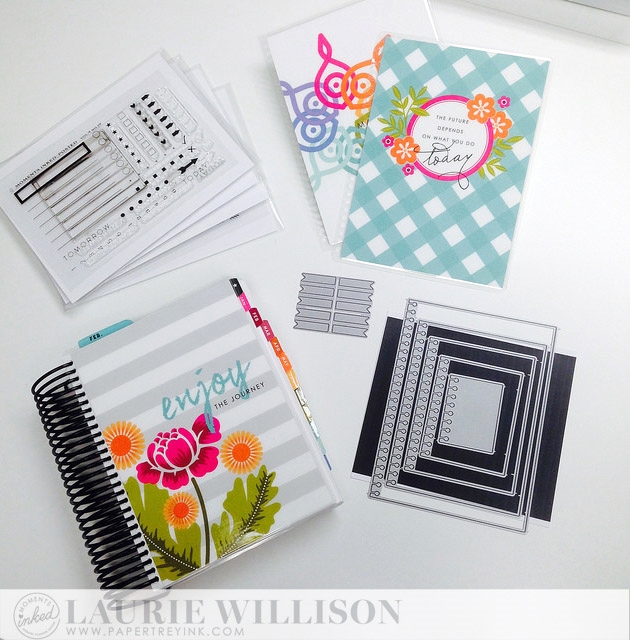
Here is a quick peak of the Moments Inked collection....
In the photo above...
- the planner
- 5 stamp sets
-3 covers
-Planner Banner Dies
-Basic Page Dies
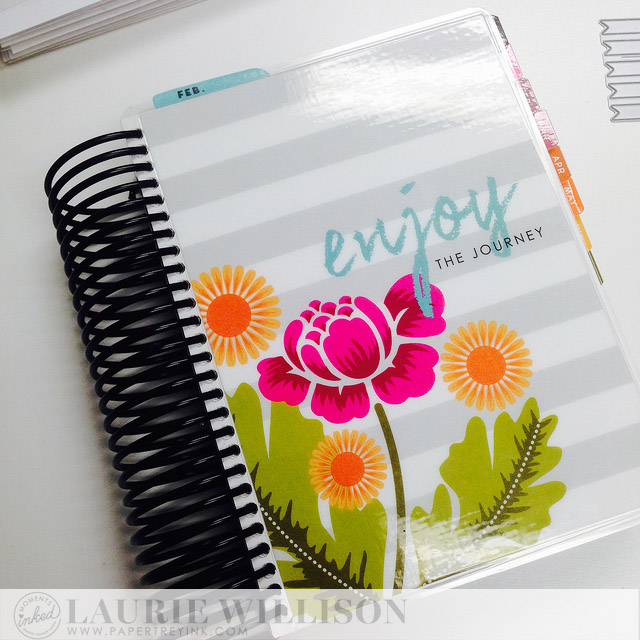
The planner is a 7" x 5" spiral bound book full of fabulousness. You will have your choice of covers and there are 3 gorgeous ones to pick from (pictured above). My favorite is the Rosie Posie and stripes cover...
There are a ton of gorgeous pages in the this, all printed in the beautiful rainbow of Papertrey Ink Colors. I have a video attached below with a more detailed look inside but I have lots (LOTS) of pictures to share here.
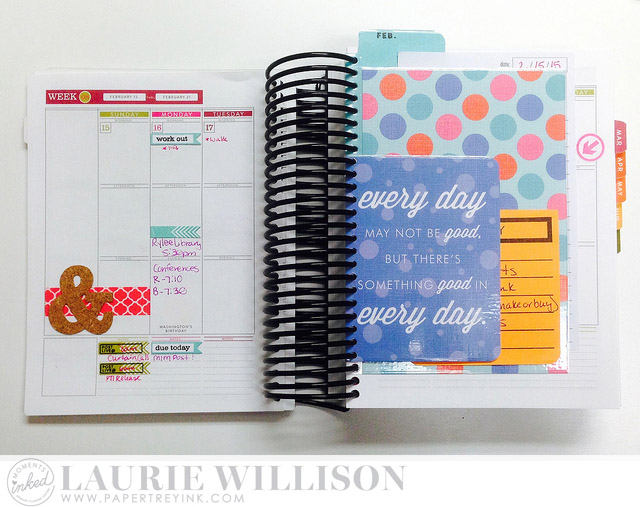
This first picture shows a page in the weekly section. The month starts with a full month view and then there are weekly views after. The days are set up Sunday though Saturday with section for Morning, Afternoon and Evening. There is a space to the left and along the bottom for notes....
I have decorated this page with some washi and an ampersand die from Grand Ampersand and then the new Planner Banners. This is a great stamp and die set that started in my head and with Nichole's help, it came to be. There are 3 sets....the main set called Planner Banners, and 2 additions called Family Planner Banners and Blog Planner Banners. So helpful in organizing family and kids, and even blog deadlines and details.
I used the Basic Page dies to make my own dashboards. One fun detail that makes this planner even more versatile is that the Monthly Moments line coordinates amazingly. I took a quote and a piece of yardstick from a Monthly Moments paper pack to make these dashboards. I laminated them and then die cut the pages. Super easy! The spiral bound border just pops right into the planner. The dashboard is great for holding lists and post its and all kinds of info.
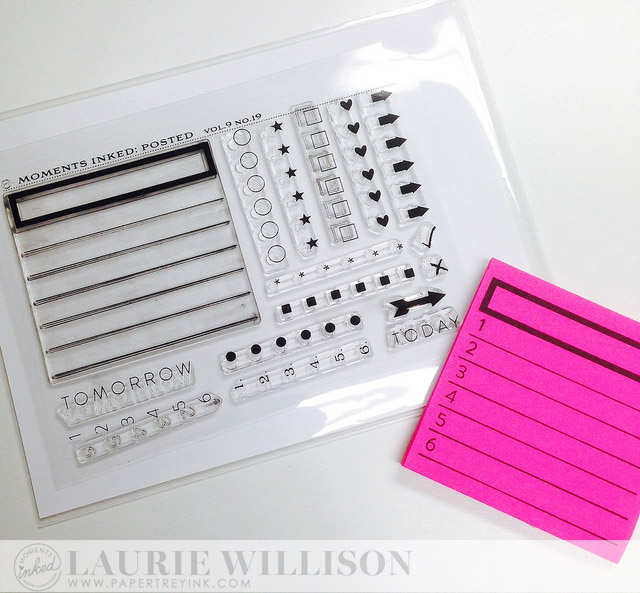
Can you see that orange Post-It note tucked in the picture above? It comes from a new set called Posted. I love post its. I think I have said this before many times here on my blog. And I love a clean list. I thought it would be so fun to have a stamp that fit perfectly within a standard post it and with different bullet points. I sent Nichole a rough drawing and she designed this....LOVE!
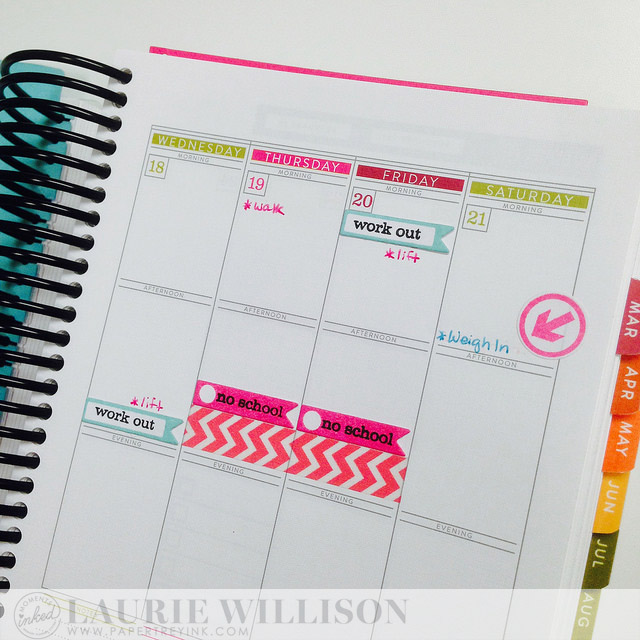
Here is a close up of the 2nd half of the week. You can see how I used the Planner Banners and even a little arrow from Monthly Moments: Clip Tips.
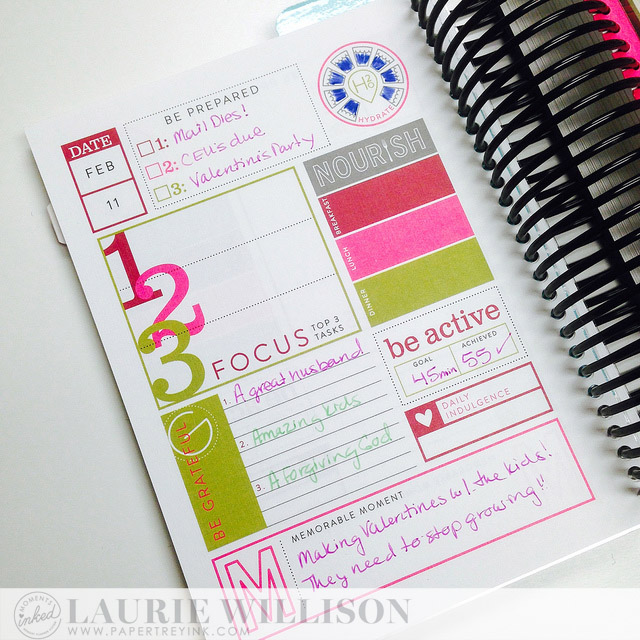
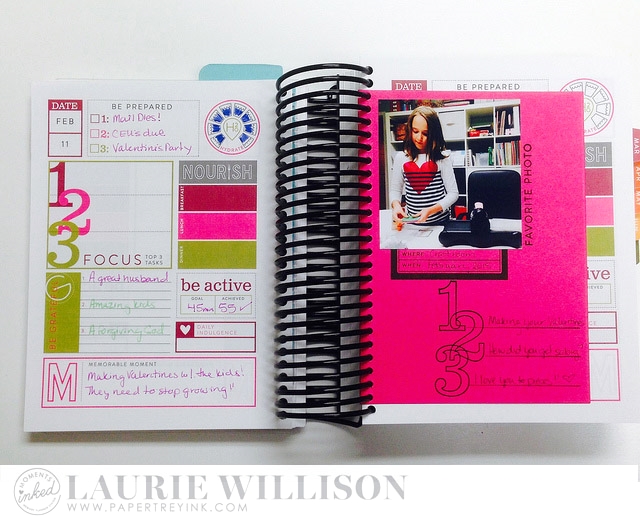
The most unique part of this planner is the daily view. This page is amazing! There is a place to keep track of life really. Hydrate for water intake, Menu planning, Be prepared for the events of the day and the best part? The Memorable Moments. A place to note things we are grateful for and a great memory for the day. I love this addition to the planner and will make this even more fun to keep track of things and moments.
I used one of the Basic Pages to make a little scrapbook page of sorts, from a picture of Rylee making her Valentines. The stamps you see are all from the new set called Remembered.
The image under the picture is actually an adorable polaroid image but I stamped the bottom and used it as a label for my photo. I stamped a couple of the other images to make this simple memory page for my planner.
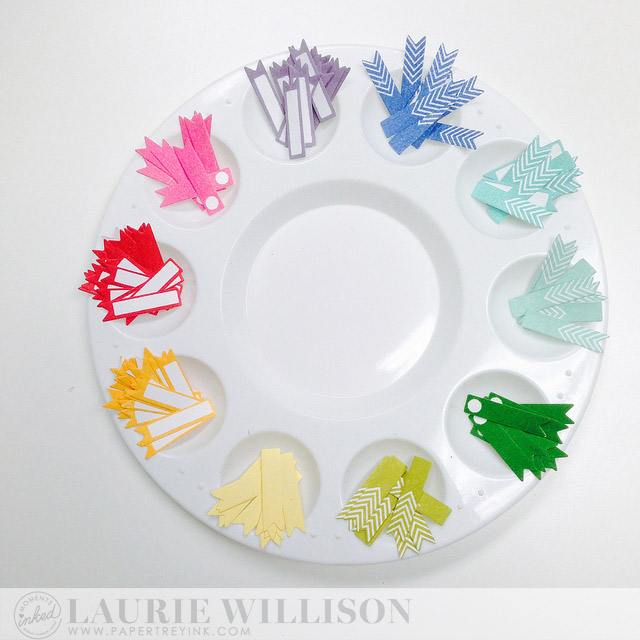
I had to get a jump start on some Planner Banners so I used the new sets and die to create a rainbow of colors....
I cut these all out of White Adhesive Sheets so they are sticky on the back. I can peel them apart when I am ready to use them. Now I will have these ready to go and can stamp on them when I need them.
To better explain the details, I made a video...
ETA: Here is a quick sideways video (ha!) on how easy it is to insert pages. Sorry about the sideways part!
There are so many more things I could share but I hate to overwhelm you, because I am sure I already have! :) I hope this leaves you inspired to start planning and stamping. This planner will be awesome for anyone who loves to be creative because it gives you a great place to plan and create in your own planner/journal.
Our new Monthly Moments Team has been announced today and I want to welcome to all of the girls! Several of them are good friends of mine and I am excited to have them along!
Head on over to Nichole's blog to check out all the details for today.
Thanks so much for coming by today! I can't wait to see what you think of this amazing planner!
Welcome back, crafty friends! Today is another fun day in the Papertrey Ink Release countdown. Today we have a scavenger hunt and a mini kit release to share.
Everyone at Papertrey Ink is excited to share the news of Betsy Veldman's new Make It Market Mini Kits! The first one being released this weekend, on Sunday, February 15th. To help celebrate, the entire design team is participating in a little scavenger hunt! Be sure to visit Nichole's blog for all the details so you can play along! EIGHT $80 Papertrey Gift Certificates will be awarded to the participants!
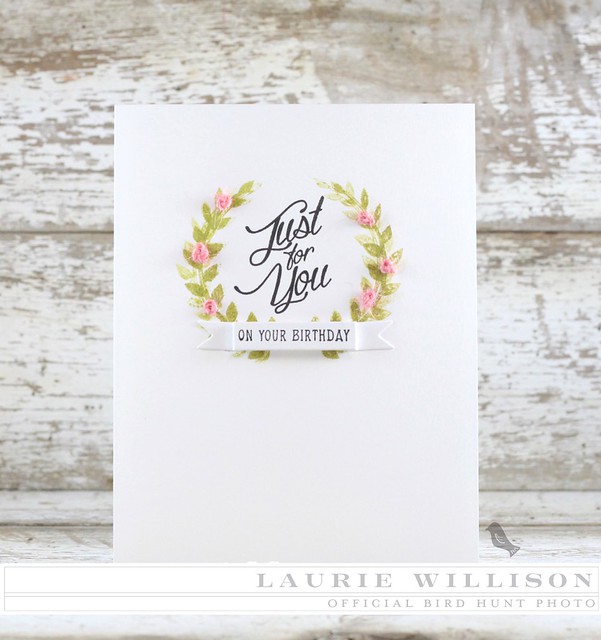
This first card was so fun to make and is not as CAS as it looks. First off, I took a full card front and stamped the the Lovely Laurels wreath on the front. It's not just Simply Chartreuse though. I took Ripe Avocado, Spring Moss and Simply Chartreuse and rubbed them on to an acrylic block. Next, I spritzed the block with water and then used that as my ink pad. I stamped the wreath 3 times on to the card base, stamping off twice. I added in the sentiment in black in in the middle. I grabbed a banner from Tag Sale #10 die and stamped the sentiment. I scored the ends of the banner to make it a little 3D and then attached it to the card front. Last, I took the pink twine from the kit and tied 6 french knots throughout the wreath to look like little roses. I used foam tape to adhere the whole card front down to the card base. CAS but not so CAS. :)
This new Mini Kit includes a mini stamp set with a laurel wreath and small images to accent it with. Gorgeous patterned papers in pretty pastels serve as quick and easy card fronts. The coordinating die is an open face die so you can cut the wreath from the papers or stamp first, then cut. Since it does not cut at the bottom and top, it allows you to bend the leaves upward for dimension. Also included in the kit are flower & leaf sequins, leaf ribbon and twine.
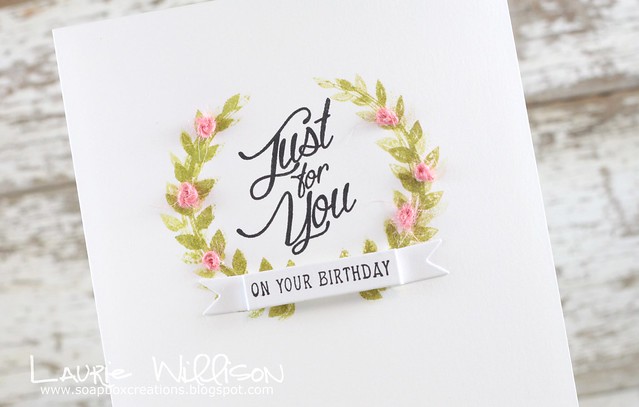
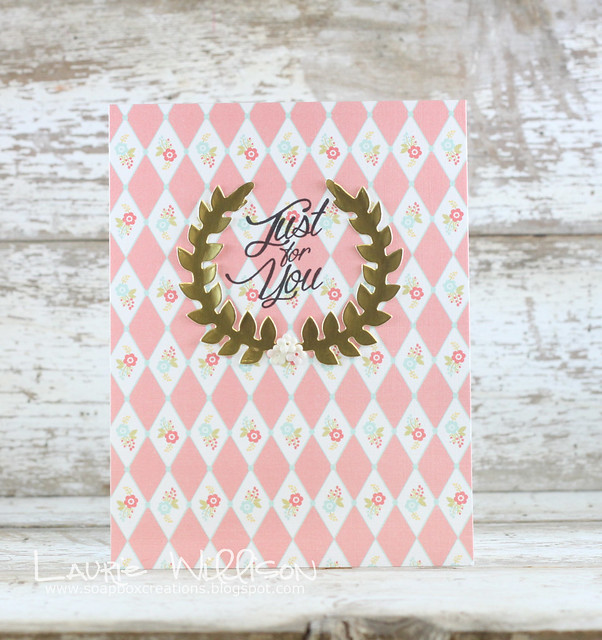
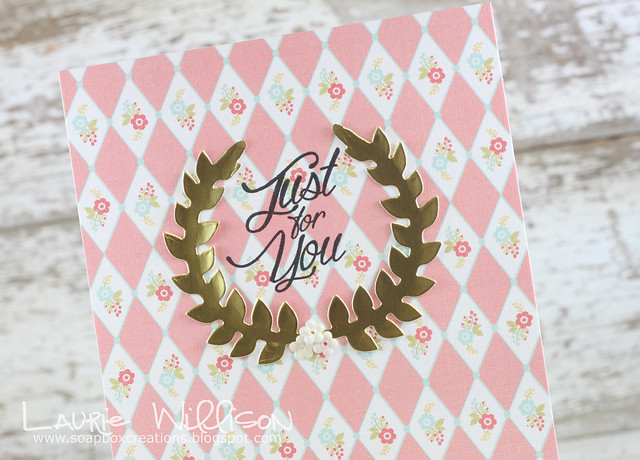
I decided to use one of the card front for my next card. I cut the laurel wreath out in the new gold adhesive sheets and trimmed the laurel wreath around the edges. I stamped the sentiment right on the pattern paper and then added in 3 little white flower sequins to the middle. So quick and easy!
That's all I have for today but the other girls have lots more to see. Stop by there blogs for more mini kit inspiration!
Hey there crafty friends! This post was supposed to go live early this morning and now here it is late at night....BUT, I'm so excited to be a featured artist over at Paper Crafts Library that I had to stop in and share!
Stop in over there and say hi! Thanks so much for stopping in!
I am a wife and a mom to little ones that I am so lucky to hang out with every day! I love to make clean and simple cards and collect stamps ...and all the other supplies for this crafty hobby! Just here to share my creations! Thanks for hanging out with me!
Want to know what a Card Hanger Die is? Click the link under my blog title above.
I DESIGN FOR:
FAVORITE PLACES TO SHOP
Search This Blog
COPYRIGHT
All images are copyright Laurie Willison. Shared images are not to be copied, without written consent, and/or used for publications or design contests. If you find yourself inspired, and I hope you do, and would like to share your idea on the internet, please note and add a link to where you found the original idea. Thank You!