It's Christmas over at Papertrey Ink and for today's Group Post we have a brand new Market Mini Kit to share. I have 2 projects to share, a gift with a card and tag, and a set of quick and simple tags.
First off, here is the gift...
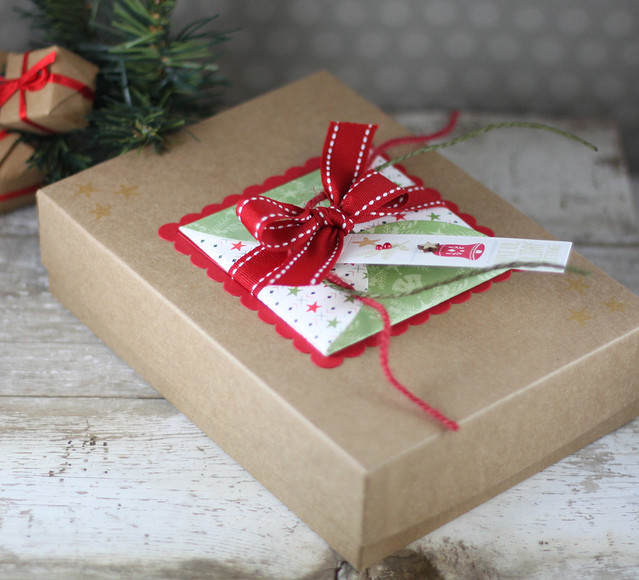
I used to get Birchbox boxes each month full of little goodies. And of course, I couldn't toss these cute little kraft boxes....so I kept them. All. :) So now I can take them out and decorate them and they are just perfect for a set of cards or any little gift.
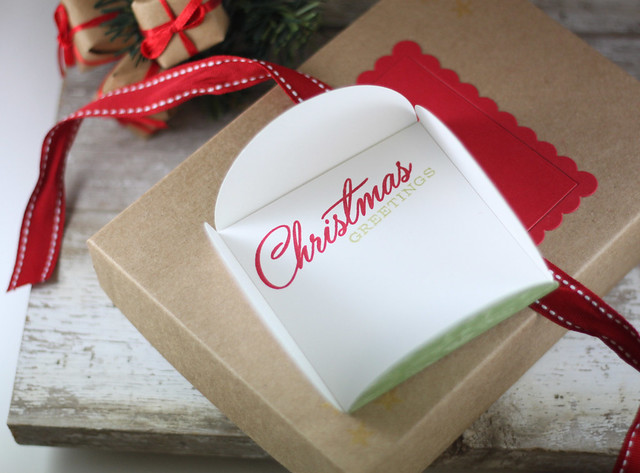
Here is how I made the little envelope that also decorates the top of this kraft box:
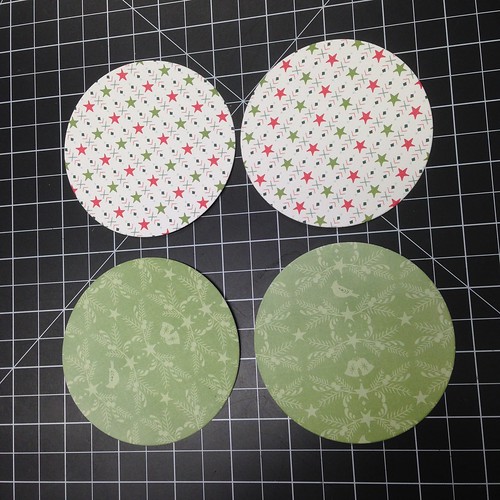
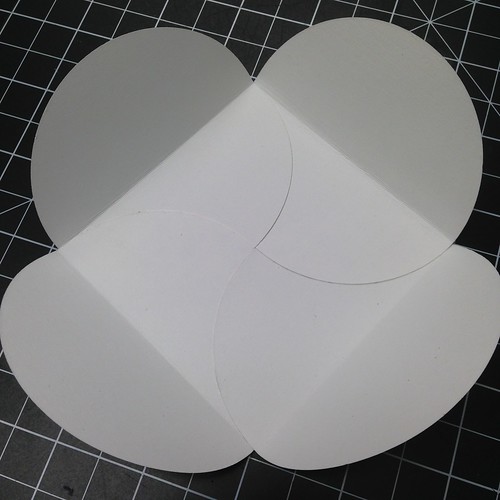
To make the top, I took the paper pack from the new Holiday Folk Mini Market kit and cut out 4 circles. The circle dies are from the Pint Size Wrap die set. I cut 2 out of 2 different colors. These dies made the perfect sized envelope!
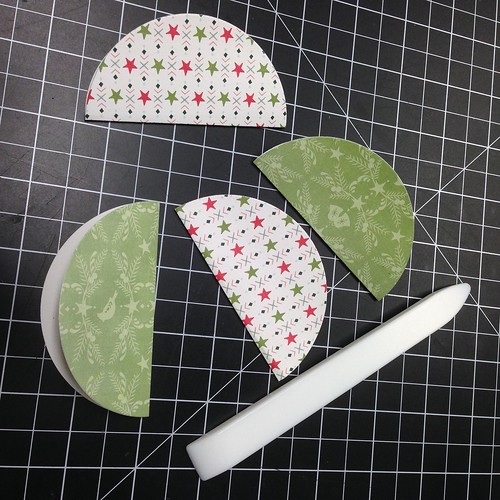
Next, I folded each one in half...
And then laid them together, one on top of the next....
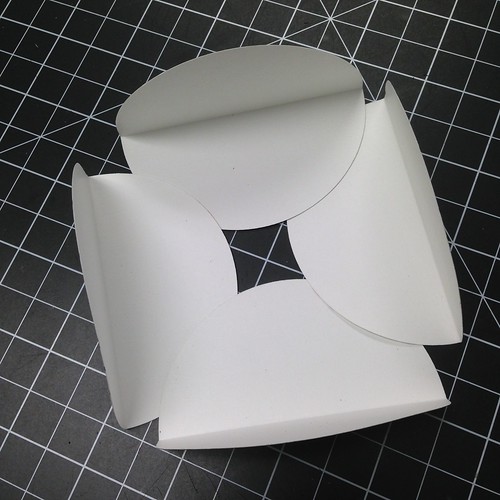
I glued the underside half of each tab to make one solid piece...
Here is a shot of the outside....
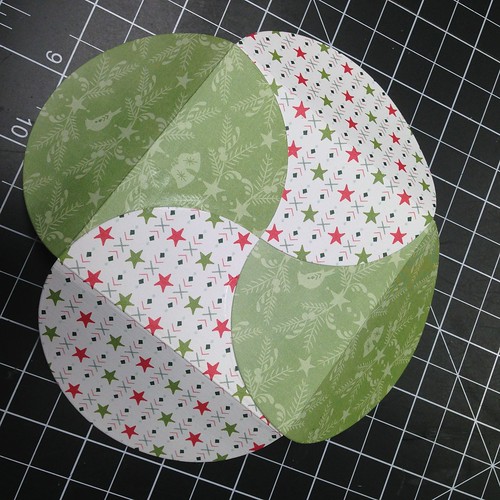
To close, you just tuck in each flap under the next.
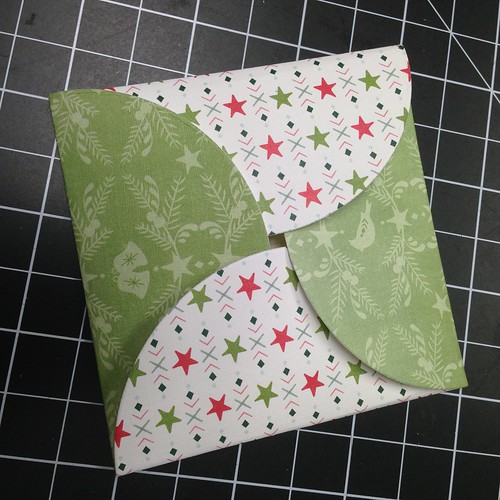
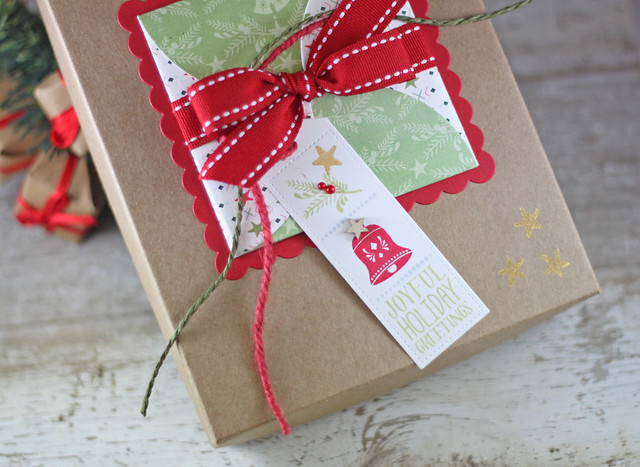
Next, I grabbed the Shaker Shapes: Square Dies and cut them out in Pure Poppy. I laid some Saddle Stitch ribbon under the center square and adhered them down just like this....
These circle dies made the perfect envelope that fit even more perfectly into the square shaker dies.
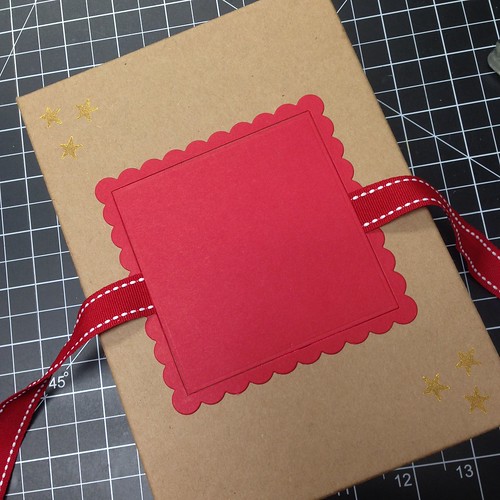
I wrapped up the little envelope by tying a bow after adding in the stamped tag using the Holiday Fold stamp set with the twine that comes in the kit.
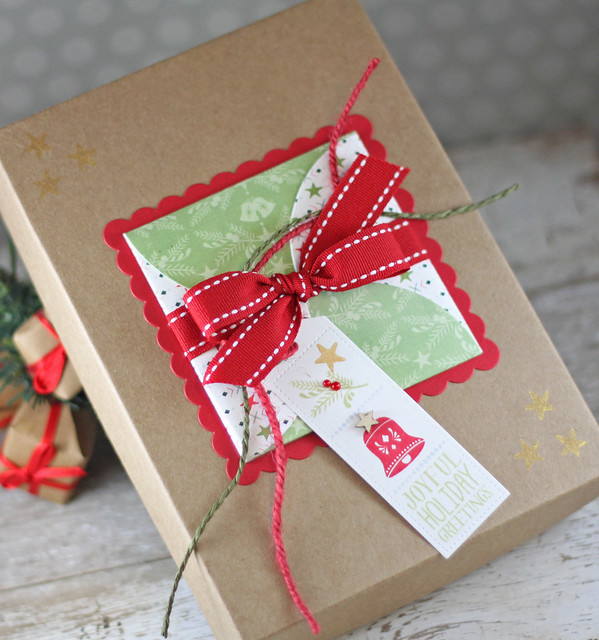
I decorated the tag with the little wooden hearts that are also included in the kit, and a couple of red pearls.
First off, here is the gift...
I used to get Birchbox boxes each month full of little goodies. And of course, I couldn't toss these cute little kraft boxes....so I kept them. All. :) So now I can take them out and decorate them and they are just perfect for a set of cards or any little gift.
Here is how I made the little envelope that also decorates the top of this kraft box:
To make the top, I took the paper pack from the new Holiday Folk Mini Market kit and cut out 4 circles. The circle dies are from the Pint Size Wrap die set. I cut 2 out of 2 different colors. These dies made the perfect sized envelope!
Next, I folded each one in half...
And then laid them together, one on top of the next....
I glued the underside half of each tab to make one solid piece...
Here is a shot of the outside....
To close, you just tuck in each flap under the next.
Next, I grabbed the Shaker Shapes: Square Dies and cut them out in Pure Poppy. I laid some Saddle Stitch ribbon under the center square and adhered them down just like this....
These circle dies made the perfect envelope that fit even more perfectly into the square shaker dies.
I wrapped up the little envelope by tying a bow after adding in the stamped tag using the Holiday Fold stamp set with the twine that comes in the kit.
I decorated the tag with the little wooden hearts that are also included in the kit, and a couple of red pearls.
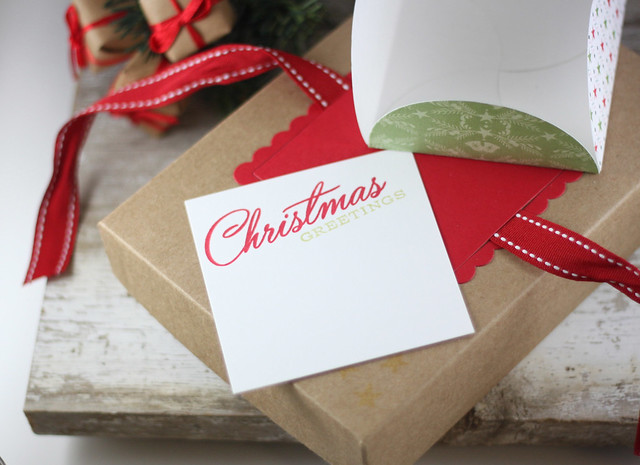
I also included a simple little card with a sentiment from Christmas Cheer stamped on the top...
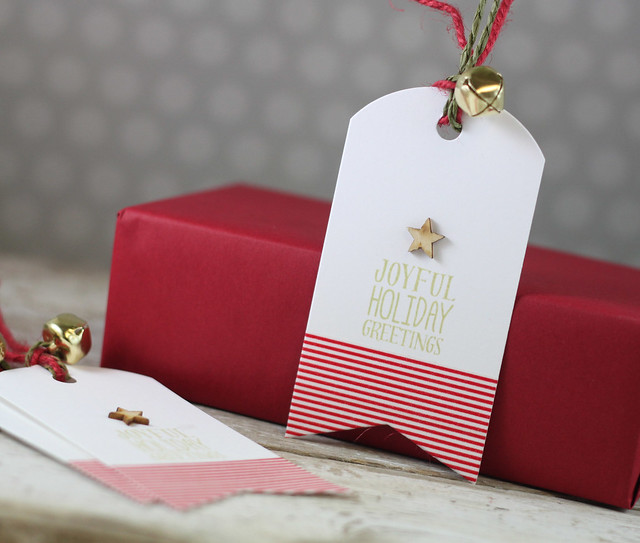
My next project is a quick set of tags using the same Holiday Folk kit. First I die cut Tag Sale #5 die and covered the bottoms in red and white striped washi.
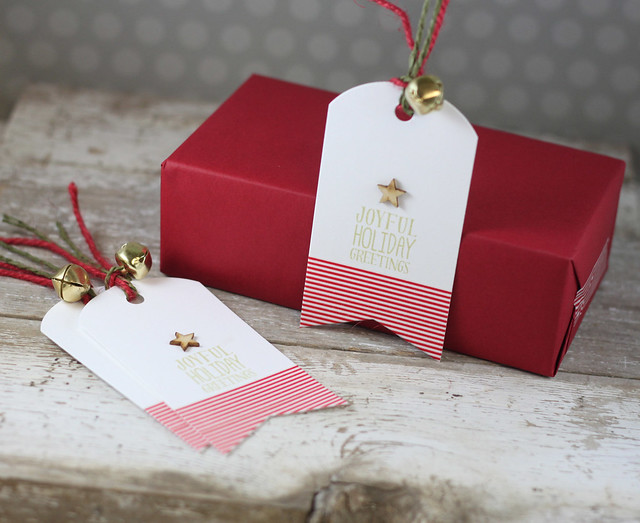
I simply stamped the sentiment in Spring Moss, added a wooden star and then finished the tag off with the twine from the kit and a gold bell.
There will be lots to see from the rest of the PTI Design Team. Here is a list of blogs to visit.
Amy Sheffer
So glad you could come by today! Stop back by tomorrow for another group project!


The little gift box and tag is wonderful. How fun would it be to receive this.
ReplyDeleteLove these tags and box toppers!
ReplyDeleteawesome idea for tags:) thanks for a great share..
ReplyDeleteThe sweetest little square envelope! I'm loving this new MIM!
ReplyDeleteLaurie!!! How adorable - and I Totally would have saved them ALL too! That envelope is fantastic ... a darling topper for a fantastic gift!
ReplyDelete=] Michele
Absolutely adorable, love the (large circle) boxes, so clever!
ReplyDeleteClever idea! Looks awesome on your package!
ReplyDeleteNeedless to say....how clever you are and talented too. Great ideas
ReplyDeleteClever gift card envelope! Love the tags!
ReplyDeleteLOVE LOVE LOVE your gift packaging! Every detail is just fabulous! And thanks for the tutorial on how to make that nifty envelope----so super fun!
ReplyDeleteOh WOW!! I love the way you recycled that box with the fabulous tag and envelope on top!! The little tags you created are so precious. STUNNING!!
ReplyDeleteThis is my favorite post to date...what a fun project and beautiful packaging idea!
ReplyDeleteI ADORE THE WASHI GIFT TAGS!
ReplyDeleteWonderful gift wrapping! And fantastic box too! Love the sweet tags with the striped washi! Gorgeous!
ReplyDeleteThanks for sharing how you made the top if the box, Love fun folds like this,
ReplyDeleteLove these tags, so pretty!
ReplyDeleteLaurie, I love all of this! It really pumped up my level of inspiration. Every time I see the saddle-stitched ribbon I'm reminded of how much I like it, but then I never seem to remember that when I go to place an order! This time, I think I'll actually get it on my wish list. The last tag you did is a great example of just how perfect a simple design can be. The jingle bells are the best finishing touch – as I said at the beginning, I really do love everything you've shown here!
ReplyDeleteOMG these are adorable! Thanks so much for the tutorial.
ReplyDeleteTracey
Fantastic projects! Thanks for including instructions on how to make the envelope topper. Love it all.
ReplyDeleteHi Laurie,
ReplyDeleteSuch INGENIOUS WORK!!!! Thanks for the inspiration and tutorial!
Cariños,
María Alba
The package topper is wonderful - cute, easy, functional, easy to mail. I adore those little tags!
ReplyDeletePretty tags Laurie!! Great idea to keep the boxes, you just never know huh!!
ReplyDeleteAll of these are so cute!
ReplyDeleteLOVE your cute little decorated box, that envelope is just awesome! Your holiday tag is also beautiful.
ReplyDeleteWhat a great idea and such a pretty simple wrapped package.. Have a blessed day
ReplyDeleteDIANA L.
DL.ART
http://dianamlarson.blogspot.com
Beautiful, Laurie!!
ReplyDeletelove them....I made the paper plate holder for banana bread and gave them away last year...I love easy and quick too and these just fit the bill....
ReplyDeleteLovely tags and gift wrapping! For the tag with the bell and evergreen spray, what die did you use to make the tag? Thanks!
ReplyDelete