9/06/19

A Clean and Simple Christmas {Spellbinders}...


Spellbinders

Hi Crafty Friends! I am stopping in with some Christmas cards because yes...it’s about that time!  I am still wondering where the summer went and just can’t believe the holidays are around the corner.  

Spellbinders Glimmer Hot Foil System is the absolute perfect place to start on your holiday cards.  There are so many amazing Glimmer Plates to make these cards quick and simple and easy to mass produce!  I have 3 cards to share today using several plates that will give you a gorgeous foiled look but keep the card making process nice and quick!

____________________________________

CARDS

Spellbinders


To create this card, I used a Hero Arts set Color Layering Holly for a bright and colorful backgorund.  I added in 2 strips of Gold Washi down the middle of the card and then finished each of the holly berries off with FSJ’s Journey Glaze.  I love the shine that adds to the background.


Spellbinders


I grabbed some Gold Foil and the Holiday Cheer Glimmer Plate to complete the main focal point on some red cardstock.  I added the panel to the card front with foam tape to give it some dimension.


Spellbinders supplies: 

______________________________________________

This next project was super quick to make.  I used the Peace on Earth Glimmer Plate to create this cleand and simple look. 

Spellbinders


Gold Foil is a great way to get the perfect shine for holiday cards.  I hot foiled the plate on white cardstock and then used washi tape to mask off lines on the front.  Using a blender brush, I ink blended in the lightest layer of gray ink for a subtle stripe.  
Spellbinders
I attached the striped panel to a white card base to finish off the card.


Spellbinders supplies: 

_____________________________________


This last card uses the Alphabet Ornament Glimmer Plate.  This plate is so beautiful with its calligraphy style font creating a fun design and one that looks amazing foiled! 
Spellbinders
To create this card, I used the Matte Gold Foil with Glimmer Plate on white cardstock.  I took a circle die and die cut the ornament. I needed some more stripes so I added washi to the front of teh circle and blended in red stripes.  
Spellbinders

Last, I tied a green bow and attached 2 gold bells to the bow.  I decided not to go for a sentiment on this card, which is unusual for me but i love how the Ornament shines by itself.  


Spellbinders supplies: 
Other supplies: Green Ribbon, Gold Bells

_____________________________________

I hope you are inspired to create some Christmas Cards today.  The Glimmer Hot Foil System is such an easy way to create cards with the wow factor for sure.  There are so many gorgeous plates and lots of colors of foil to choose from, so the possibilities are endless.  Click HERE to check out all of the Holiday Glimmer Plates!
Thanks so much for coming by today.  Hope you have a great day!


_____________________________________


FIND ME OVER ON:

Instagram: Laurie Willison (@laurie_willison)


Facebook: Soapbox Creations

All products in today's post are linked below and throughout the post.  These are my personal affiliate links which you can shop from at no cost to you!  :)  Thank you for supporting Soapbox Creations!  
9/05/19

Altenew September 2019 Stamp/Die/Stencil Release Blog Hop + Giveaway


Hello!  Today is a great day over at Altenew.  The September Release is here and there are so many amazing new stamps and dies.  I have a couple of projects to share wit you today so keep scrolling to check them out.  There are prizes too!  So don't forget to comment to win.  You can read about them at the bottom of this post and also find the Blog Hop List for today.  I am sure there is some amazing inspiration to be seen today with all of the new September products. 

Altenew

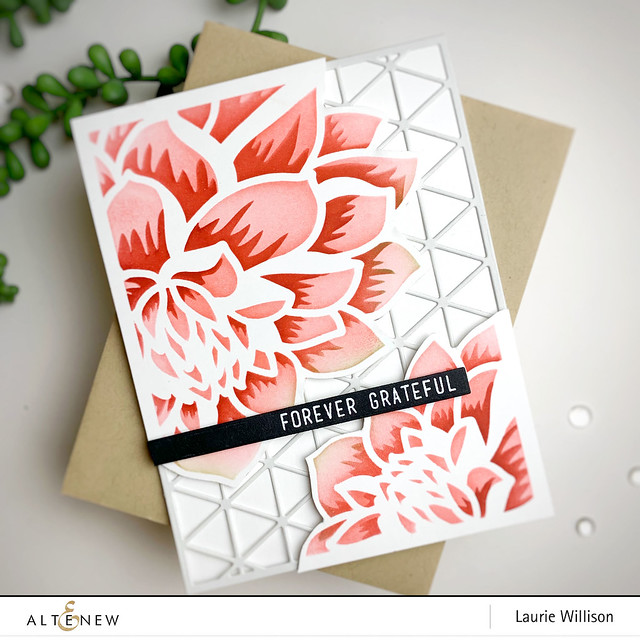
This first one uses the new Layered Snowflake Cover Die in the background.  I used a white card base and a light card card stock for the Cover Plate.  There are 2 plates that coordinate together but I love how using one plate in a light cardstock gives a fun and simple background look.  I layered the Dahlia Stencils  on top with foam tape after cutting out a couple of the pieces from the full stencil.

Altenew-Layere Altenew dSnowflakeCoverPlateB-LaurieWillison2


This card needed a little contrast so I added in a heat embossed sentiment in black card stock to finish it off.

Altenew

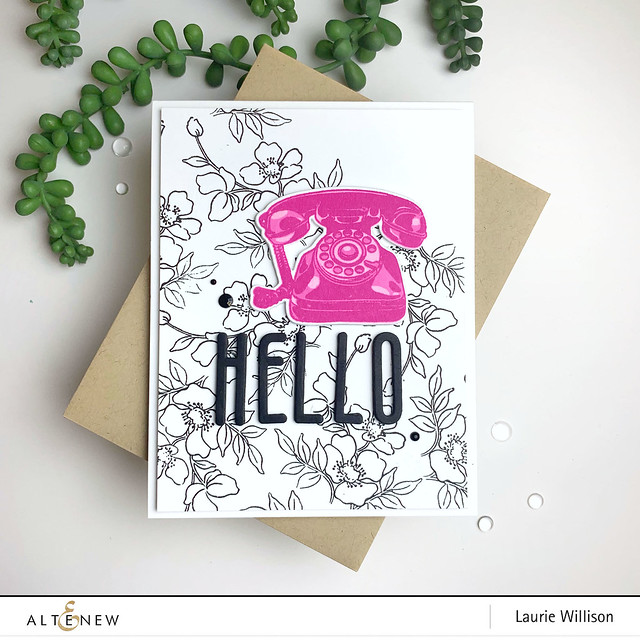
This next card uses the new set called Flower Garden in the background and that adorable phone from It's For You.  I also added in the Tall Alpha Dies to create the word Hello.

Altenew


First off, I stamped one of the blooms from Flower Garden for a black and white background.  I die cut the word Hello from the Tall Alpha and added that to the card front. 


Altenew

Last, I stamped that adorable new phone from It's for You in pink inks and popped it up on the card front.  I finished the card off with some black enamel drops.

Altenew

Click HERE to see Altenew's entire September Release. 

You can also check out the full Altenew Bundles.  They package everything into one spot so its easier to grab it all at one time.  


_____________________________________


GIVEAWAY

To celebrate this release, Altenew is giving away a $50 gift certificate to 6 lucky winners! Please leave a comment on the Altenew Card Blog and/or Altenew Scrapbook Blog by 9/10/2019 for a chance to win.

We’ll also draw a winner to receive a $20 gift certificate from the comments left on each designer’s blog on the blog hop list below. All winners will be announced on the Altenew blogs on 9/13/2019.

_____________________________________


BLOG HOP


_____________________________________


FIND ME OVER ON:

Instagram: Laurie Willison (@laurie_willison)


Facebook: Soapbox Creations

All products in today's post are linked below and throughout the post.  These are my personal affiliate links which you can shop from at no cost to you!  :)  Thank you for supporting Soapbox Creations!  

9/03/19

My Monthly Hero Blog Hop....


Good afternoon!  I am hopping along with the girls over at Hero Arts today to showcase the newest My Monthly Hero Kit.  This kit is full of all thing Halloween.  The stamp set has lots of detailed images to make your kit projects pop!  Check it out...


Kit Contents:

6" x 8" Clear Stamp Set
1 Peek-a-boo Drawers Fancy Die
3 Fancy Dies
Bronze Silk Ink 0.5 fl. oz.
10 Bee & Key Charms
6 5.5" x 8.5" Sheets of Decorative Paper (Rich Copper, Urban Basilia Black, Wood Abachi Solid)


This month's kit value is $76.49 but the retail price for everything in the kit is $34.99.  You can subscribe to the My Monthly Hero Kit and ensure that it is mailed to you each month.  Click HERE to subscribe.  

***As we launch this kit, our hearts are heavy with the news out of the Bahamas, and our thoughts are with the East Coast of the United States as we all hope and pray the hurricane stays out to sea. For each September kit sold, $1 will be donated to help those impacted by the devastation and displacement caused by Hurricane Dorian.***


_____________________________________


CARDS


My Monthly Hero Kit

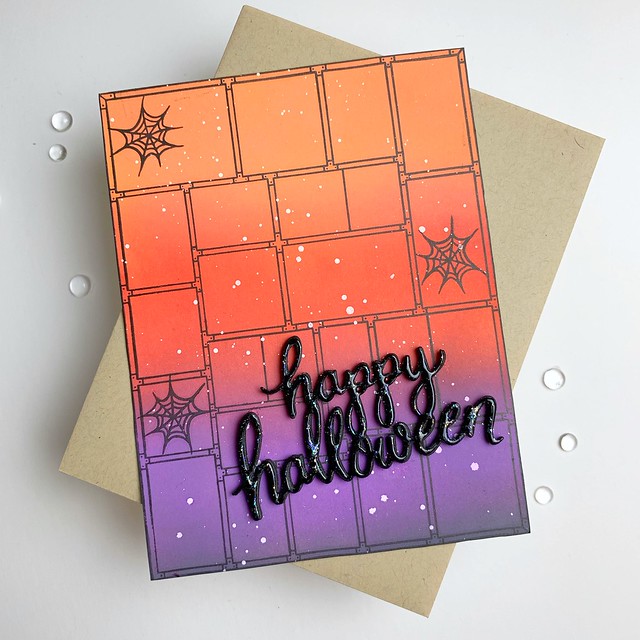
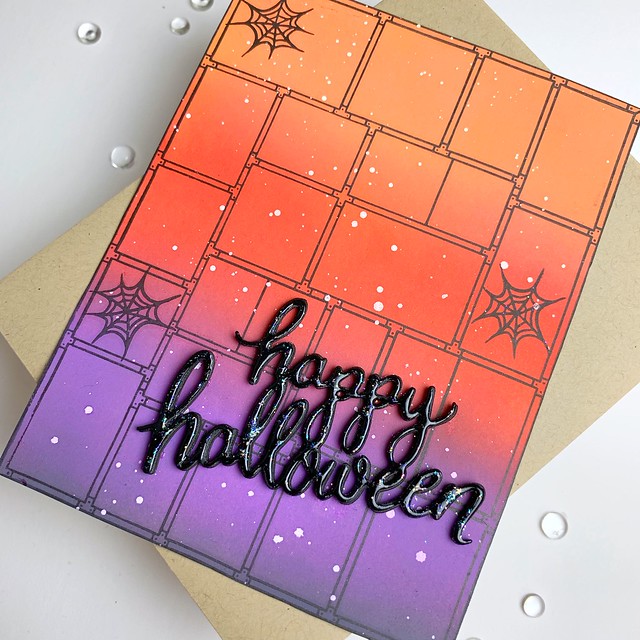
I love the large background image in the kit and had to use that on the first card.  I first blended up 3 oxide inks to create the background.  Next, I stamped the background image in black ink.  

My Monthly Hero Kit

I added in some white paint splatter along with 3 little spider webs. Last, I die cut the sentiment in black card stock and black fun foam to create a dimensional sentiment.  I topped it off with some Glossy Accents and a tiny bit of glitter.

My Monthly Hero Kit

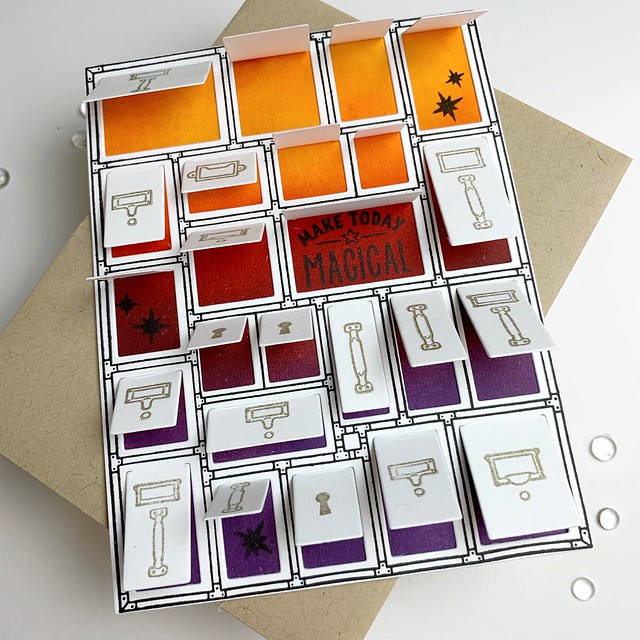
I wanted to use all those pulls from the kit so I stamped and die cut the background with the large cover plate from the kit.  I grabbed some gold ink and stamped all the pulls and key holes on each door.  

My Monthly Hero Kit

It was hard not to put a sentiment on the outside of the card but I wanted to keep the look simple on the outside.

My Monthly Hero Kit

On the inside, I did another ink blended background (because the first one was so fun!) and then just stamped a few stars on the inside and also added the sentiment.  


My Monthly Hero Kit

The inside images are from the add on set called Pure Magic.

The kit has several add-ons that coordinate with the Halloween Theme.  Click HERE to check out all of this months add-ons.

_____________________________________

GIVEAWAY


Hero Arts will give away one kit, drawn from the comments left across the hop. Enter by Sunday, September 8th at 11:59pm pacific, and the winner will be announced on the Hero Arts blog the following week.

_____________________________________

BLOG HOP


I hope you have enjoyed my stop on the hop today.  Thanks for coming by!


_____________________________________

FIND ME OVER ON:

Instagram: Laurie Willison (@laurie_willison)


Facebook: Soapbox Creations

All products in today's post are linked below and throughout the post.  These are my personal affiliate links which you can shop from at no cost to you!  :)  Thank you for supporting Soapbox Creations!  


MFT and Friends...


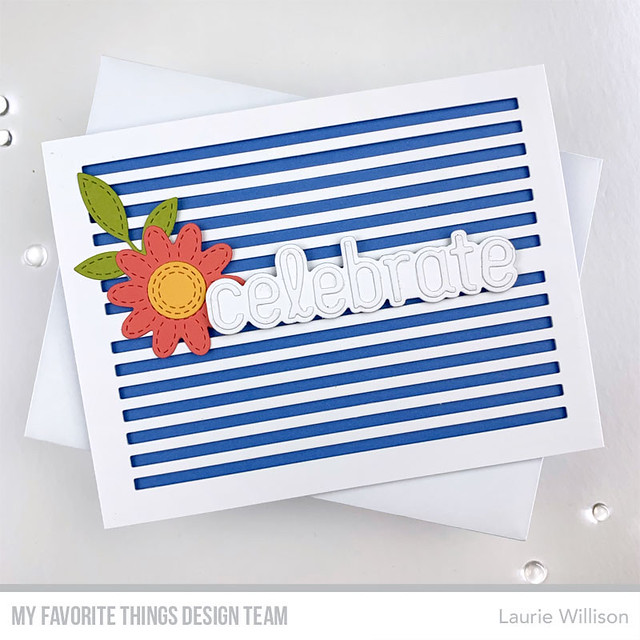
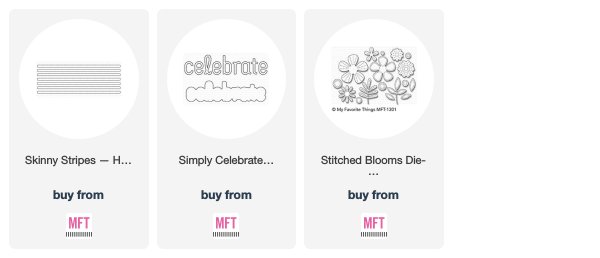
It's Release Day over at MFT!  Are you ready to shop?  Head over there to check out the entire release.  I have one last card to share.  I am using my favorite new die from this release.  The Skinny Stripes Die-namics.....

MFT and Friends

I cut the die twice on a white card stock panel and then added foam tape around the outside and down the middle.  I added it to a blue card base.  I used the celebrate die from last months release for the sentiment and tucked in a stitched flower for a pop of color

MFT and Friends

So many things to chose from this month!  What do you have on your wish list or in your cart?

Thanks so much for coming by today.  I hope you have a great week!


_____________________________________


FIND ME OVER ON:

Instagram: Laurie Willison (@laurie_willison)


Facebook: Soapbox Creations

All products in today's post are linked below and throughout the post.  These are my personal affiliate links which you can shop from at no cost to you!  :)  Thank you for supporting Soapbox Creations!  

 
BLOG TEMPLATE BY DESIGNER BLOGS